Dinosaur Sensory Bin Using DIY Kinetic Sand
Create this Dinosaur Sensory Bin using homemade kinetic sand, mini dinosaurs, and dino-themed treasures! The perfect small world sensory play activity for kids who love to dig, stomp, and explore!
Always supervise children during sensory play. See full disclaimer here. This post may contain affiliate links, which means I may earn a small commission if you make a purchase through these links, at no extra cost to you. As an Amazon Associate, I earn from qualifying purchases. I only recommend products I personally use and love! You can read more about my disclosure policy here.
If you’re looking for a hands-on sensory adventure that brings the excitement of a prehistoric world to life, this Dinosaur Sensory Bin is just what you need! It’s a fun and engaging activity for toddlers, preschoolers, and even older kids!
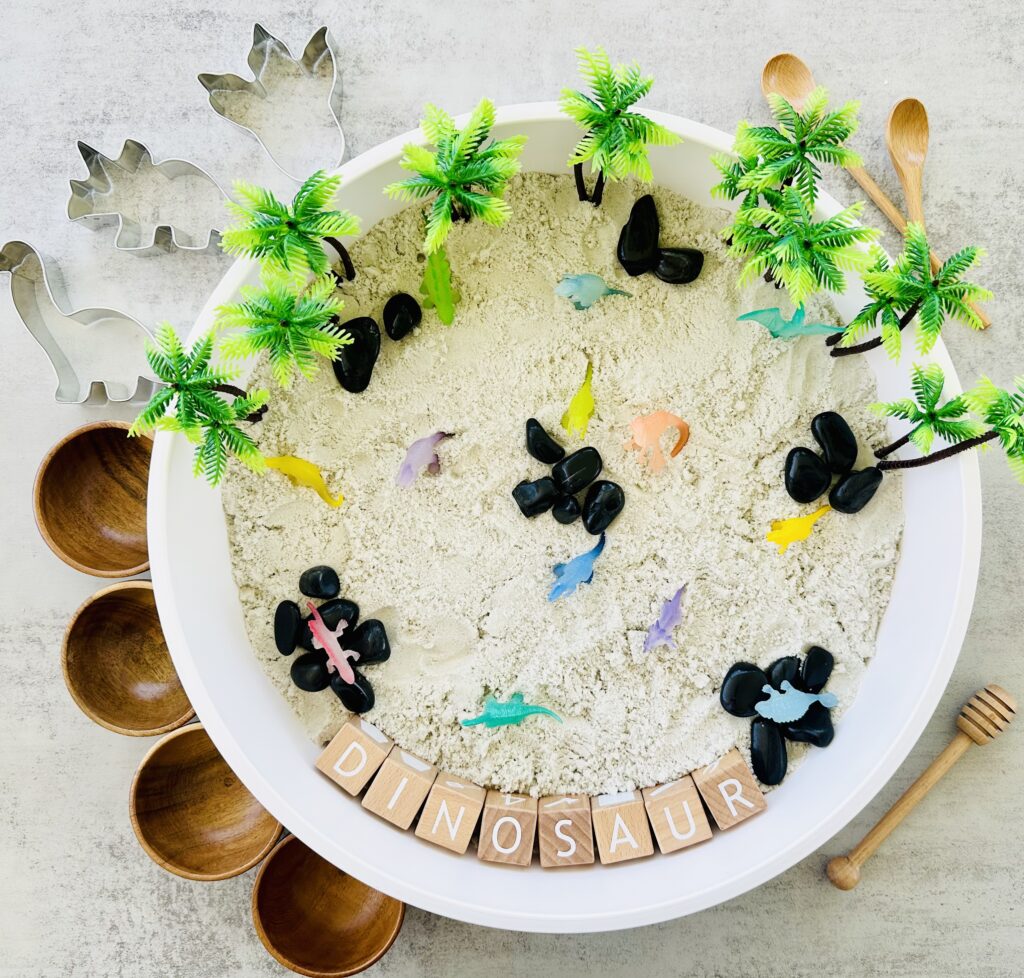
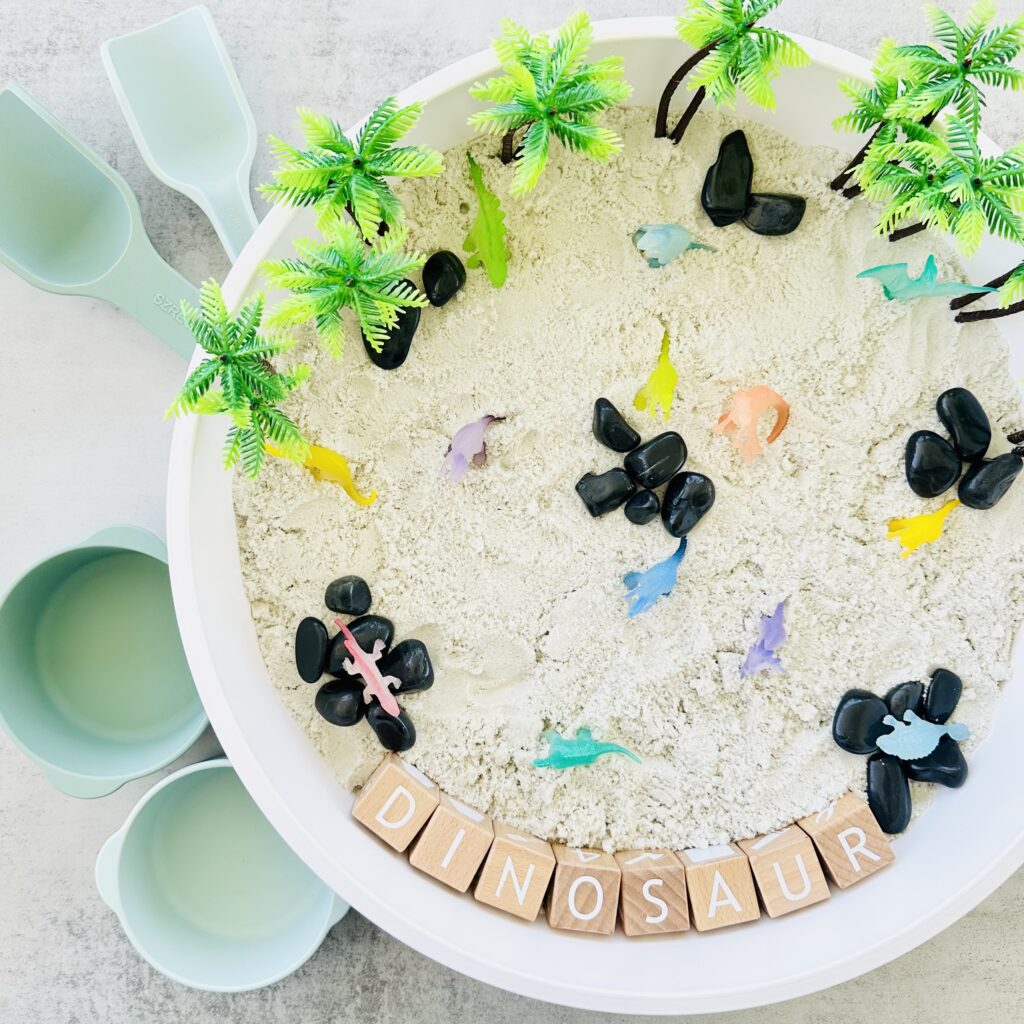
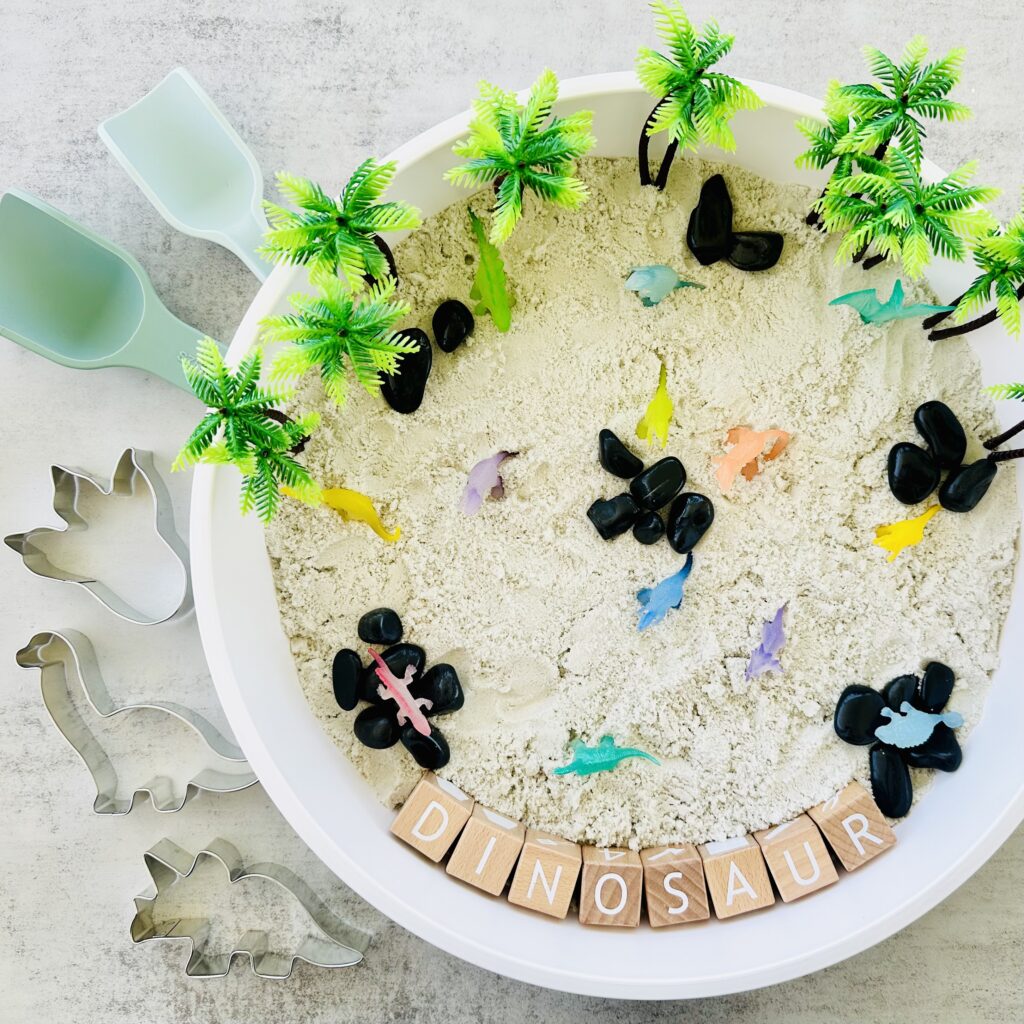
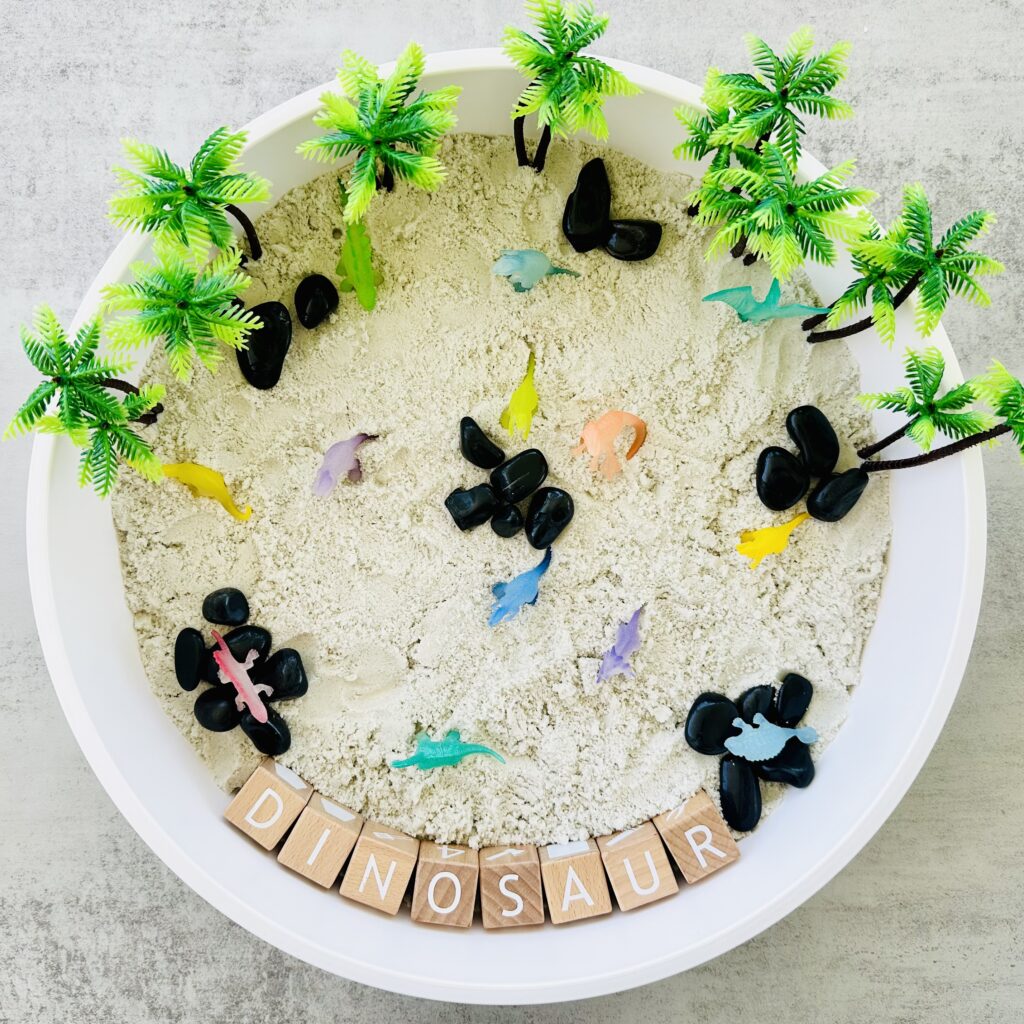
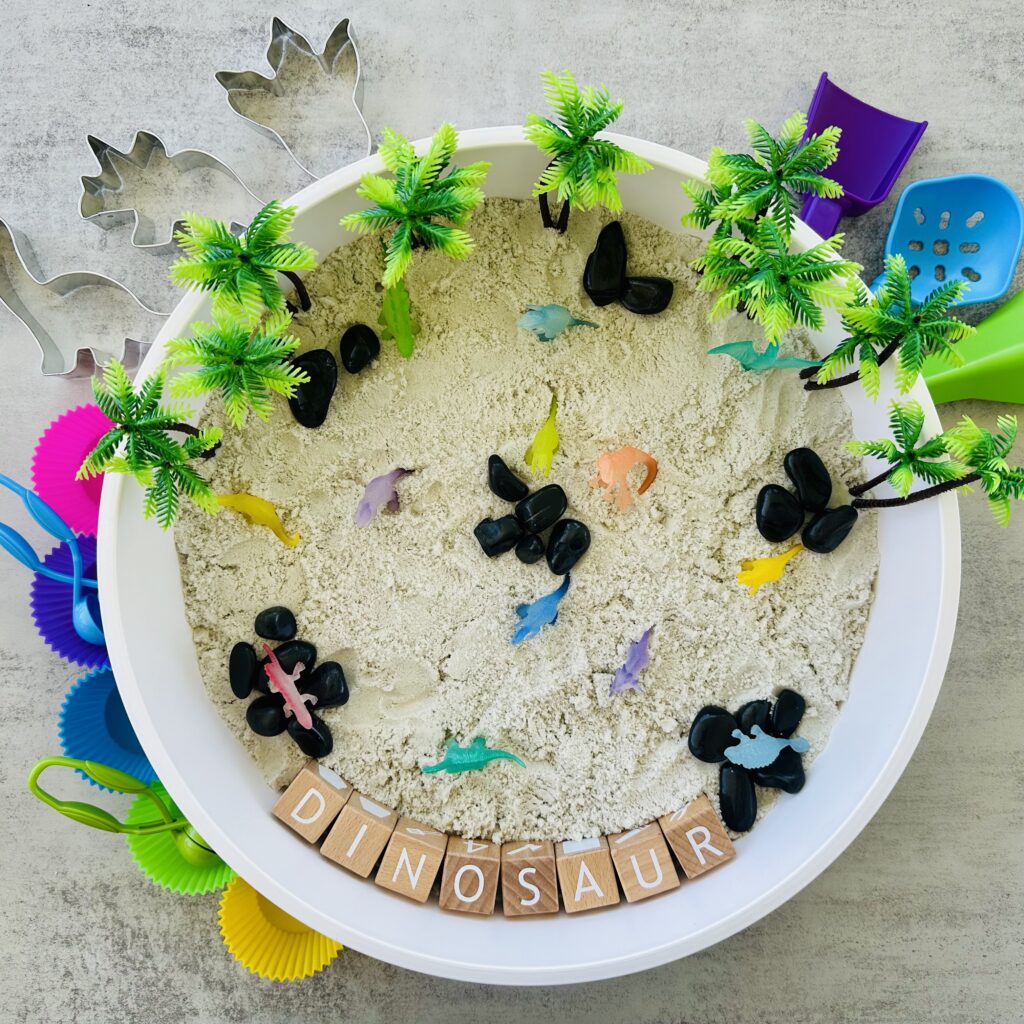
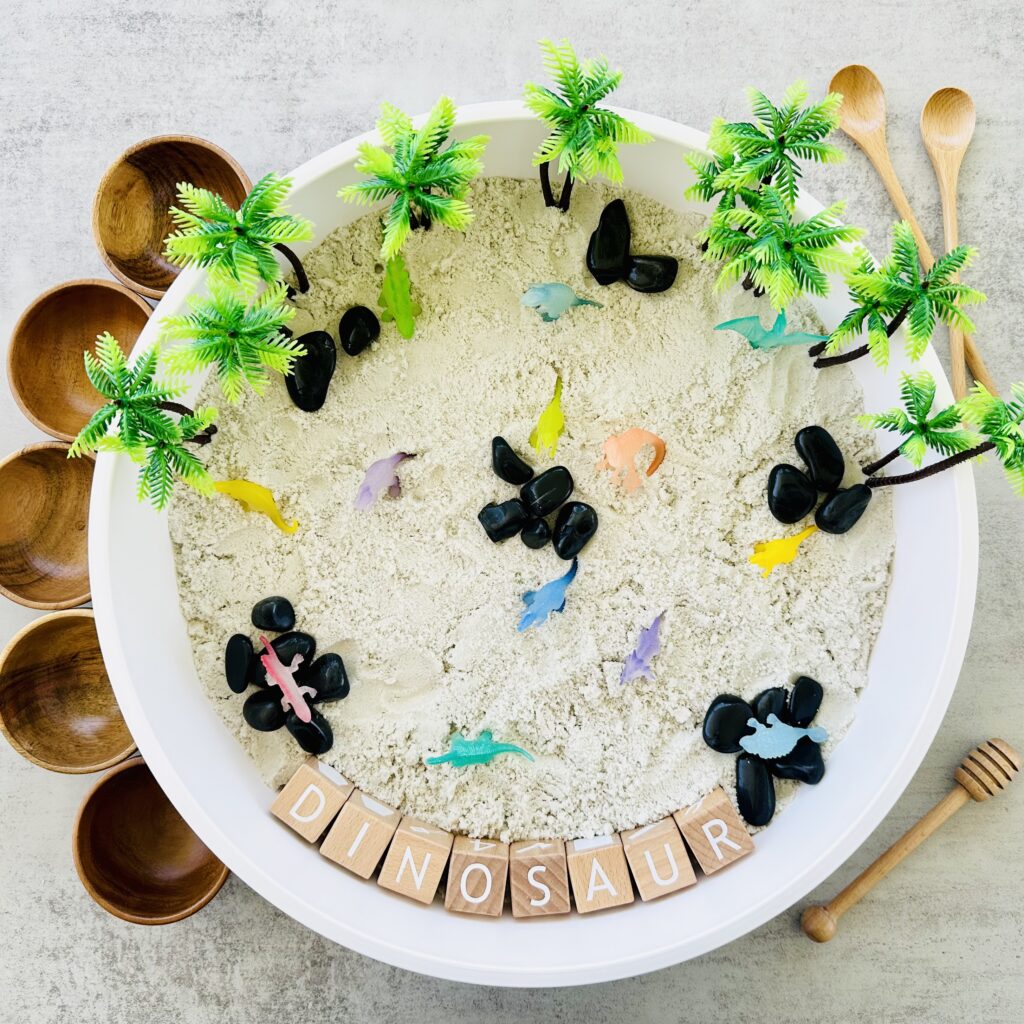
We use homemade kinetic sand as the base and dinosaur-themed items like mini dinos, rocks, and trees to create an exciting small world sensory play setup that sparks creativity and imaginative play!
Why This Dinosaur Sensory Bin Is A Must-Try
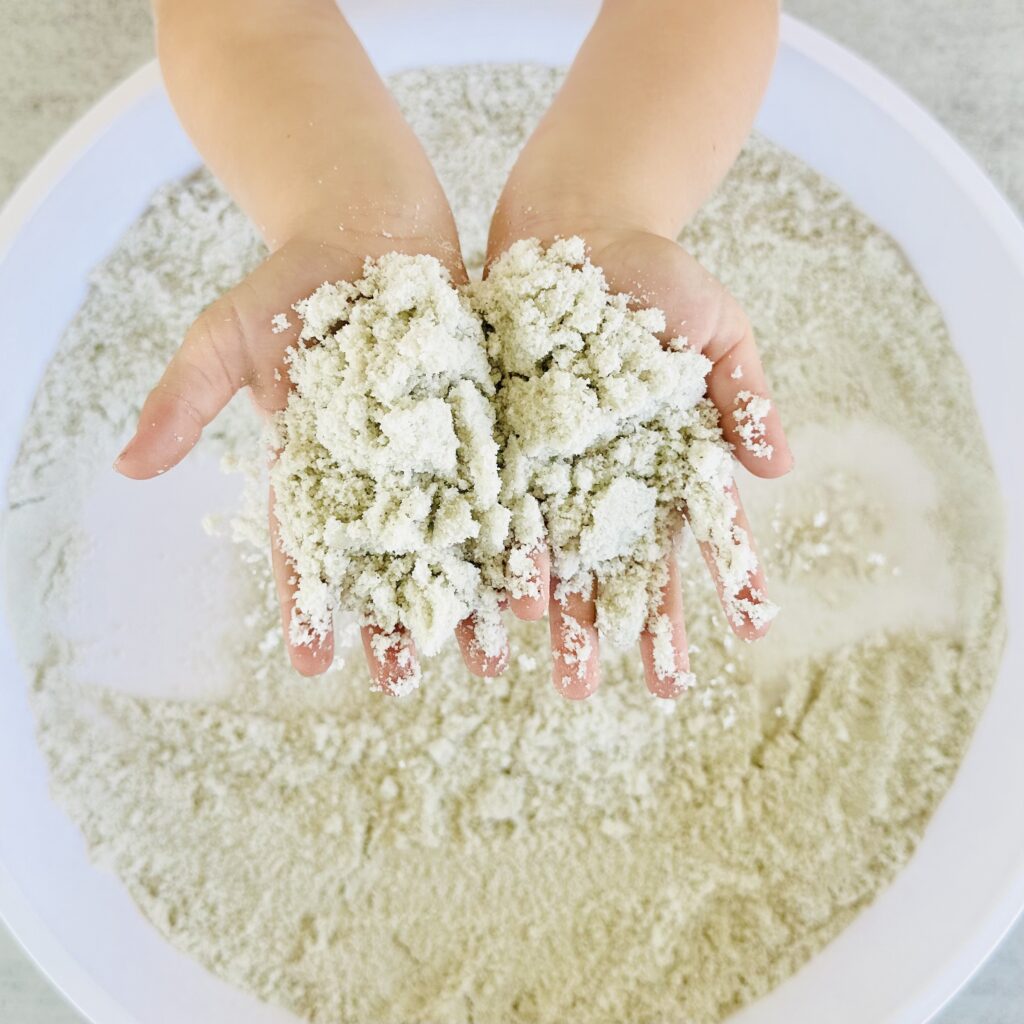
If you’ve never made kinetic sand before, you’re in for a treat! It’s soft, fluffy, and silky to the touch, but still holds its shape when pressed. It’s perfect for little hands to dig, scoop, and mold prehistoric landscapes with.
To make the dino world feel realistic, we added mini dinosaurs, small rocks, and faux plants. These materials encourage your child to create their own little dinosaur habitat complete with volcanoes, hidden fossils, and jungle terrain ready to be explored.
Kids will love stomping dinos through the sand, burying “fossils,” and diving into their very own dinosaur land!
How to Create a Dinosaur Sensory Bin
What You’ll Need
You could buy Kinetic Sand or make your own (it’s so easy!). If you’re worried about younger kids putting it in their mouths, you might want to try making our Taste-Safe Kinetic Sand Recipe which uses food-grade ingredients. Here’s everything you’ll need to make a batch of Kinetic Sand:
- 2 cups Play Sand (we used white play sand but any color works!)
- 1 1/2 cups Cornstarch
- 1/2 cup Vegetable Oil
Extras for the dinosaur sensory bin:
- Plastic dinosaur figurines (in a variety of colors)
- Rocks or pebbles (to create some texture)
- Mini trees or foliage (for a jungle vibe)
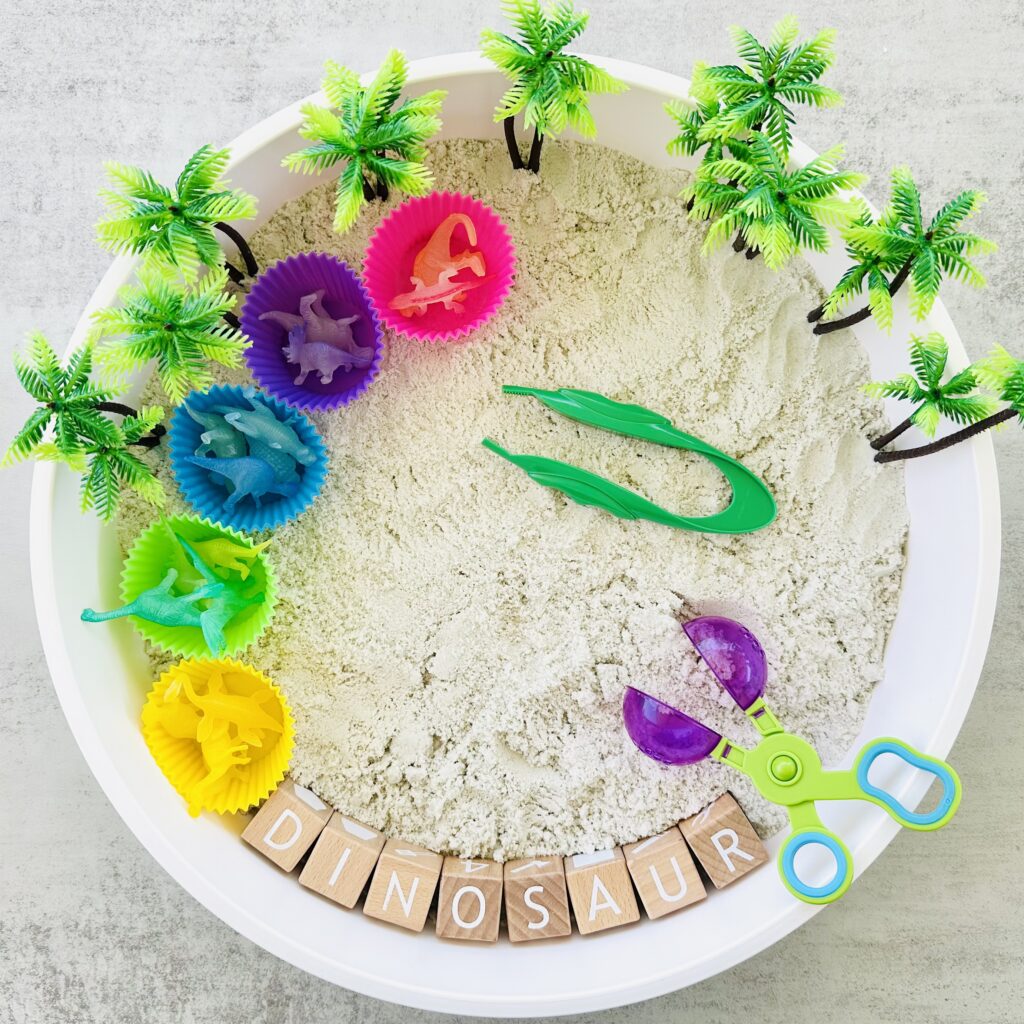
- Silicone Cupcake Liners or Small Bowls
- Scoops and Funnel or Tongs and Tweezers
- Sensory Bin (or any container big enough for your child to play in)
Pro Tip: This sensory bin uses kinetic sand as the filler. But if you want to switch it up, other sensory bin fillers like taste-safe kinetic sand, moon sand, dyed rice, dyed chickpeas, cloud dough or even edible playdough work great too! You can buy these materials, or if you’re feeling crafty, you can make your own.
Be sure to check out our blog post about essential sensory bin supplies to have on hand, making it easy to set-up multiple different sensory bins in seconds!
Kinetic Sand Instructions
1. Mix Dry Indredients
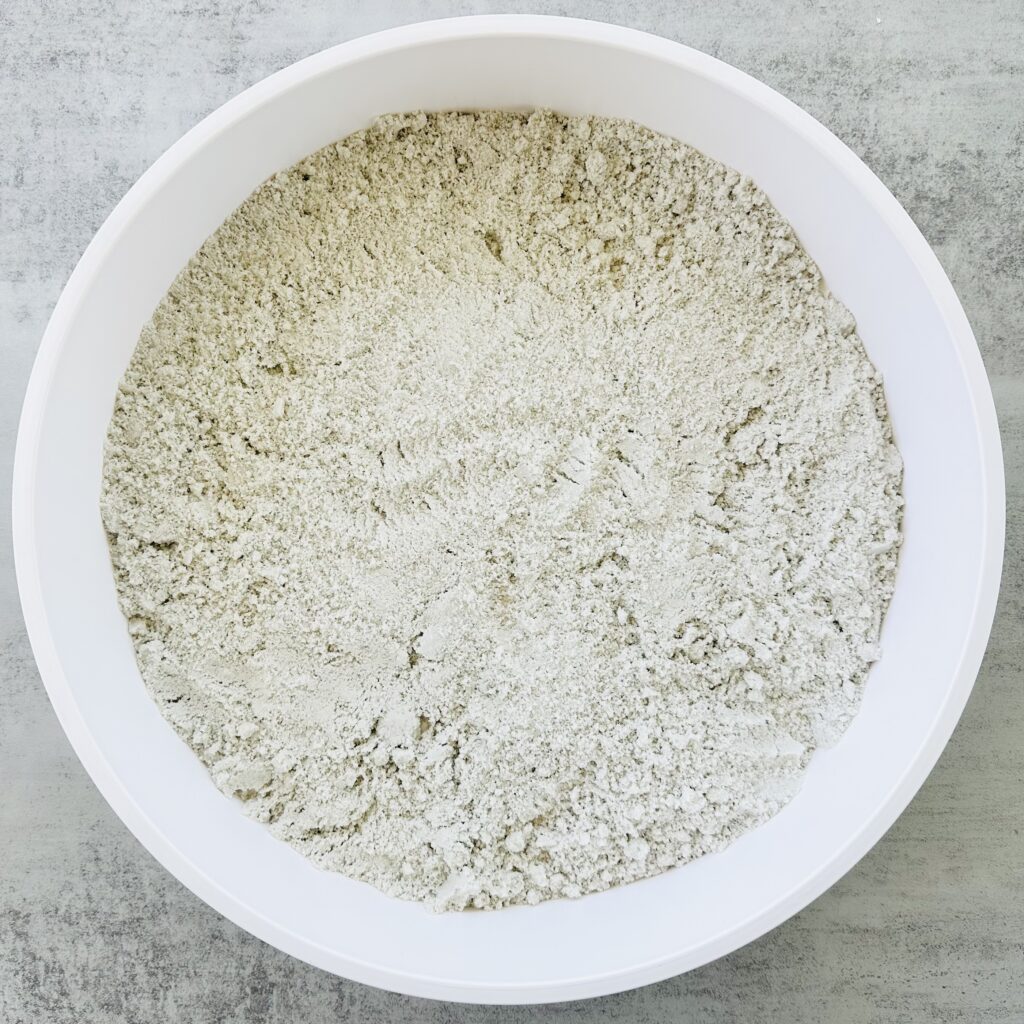
Add 2.5 cups of fine play sand and 1.5 cups of cornstarch into a mixing bowl. Stir well to evenly distribute everything.
3. Add Oil
Slowly mix in the 1/2 cup oil.
3. Mix It All Together
Use your hands to knead the mixture until it’s fully combined and has a soft, moldable texture. If it’s too dry, add a tiny bit more oil. If it’s too wet, sprinkle in a little more cornstarch.
4. Optional Extras
If you’re feeling fancy, now’s the time to add a few drops of essential oils for a lovely scent or a sprinkle of glitter for some sparkle. Just make sure it’s safe for kids and won’t irritate sensitive skin.
Dinosaur Sensory Bin Instructions
1. Fill the Bin
Start by adding your homemade kinetic sand to your large container or sensory bin. Spread it out evenly across the base to create a soft, moldable surface that feels like a prehistoric ground. This is the “dirt” your little explorers will be stomping through!
2. Add Dinosaur Items
Next, place your dinosaur-themed treasures into the sand. Add mini dinosaurs, rocks, trees, and even little “fossils” or “dino eggs.”
3. Add Scoops and Tongs
To make the bin even more interactive, toss in some scoops, tongs, and bowls to give your child even more ways to explore. These tools promote fine motor development as kids dig, excavate, and uncover dinos and rocks.
4. Let Them Play
Now that your dino world is ready, it’s time for some prehistoric sensory fun! Sit back and watch as your child stomps dinosaurs through the sand, digs up fossils, and gets lost in their very own Jurassic adventure.
Creative Play Ideas For Your Dinosaur Sensory Bin
You’ll be amazed by how long your child stays engaged in this sensory world! Once they start digging, roaring, and building, the play possibilities are endless. Here are a few fun ideas:
1. Dinosaur Storytime
Pair the bin with a dino-themed book like How Do Dinosaurs Say Goodnight, National Geographic Little Kids First Big Book of Dinosaurs, or Dinosaur Roar!. After reading, encourage your child to recreate scenes or make up their own Jurassic adventures.
2. Treasure Hunt
Hide small dinos, rocks, or any other dino themed trinkets in the kinetic sand and have your child dig them out using tweezers, scoops, or tongs. It’s a simple game that boosts fine motor skills and keeps the excitement going.
3. Volcano Build and Erupt
Let your child build a pretend volcano using the sand, then pretend it erupts as dinos run for cover! You could even add a mini DIY baking soda and vinegar volcano for added excitement.
4. Free Play
Sometimes the best moments come from unstructured exploration. Unstructured exploration is calming and can help your child self-regulate after a busy day. Let your child stomp around, bury items, and create scenes without instructions. Ask open-ended questions like “What kind of dinosaur is that?” or “Where do they live?” to inspire deeper imaginative play.
Tips for Making the Most of Your Kinetic Sand
Safety When Playing with Sensory Bins
Sensory bins are amazing, but it’s always good to keep a few safety tips in mind:
- Supervise younger kids. If you have toddlers or babies playing with the bin, always keep an eye on them to make sure they’re not putting any small objects in their mouths. Choking hazards are a real concern, so be mindful of the size of the objects you include.
- Watch out for sharp or fragile items. Avoid anything that could potentially break or shatter in the bin. Stick to soft or flexible items like plastic figures, pom-poms, and silicone or plastic scoops.
- Keep it clean. Sensory bins can get messy! Lay down a sheet or tablecloth underneath to catch any runaway sand or small pieces. This makes cleanup a breeze.
Why We Love This Dinosaur Sensory Bin
This kinetic sand dinosaur sensory bin is a hit for kids of all ages. It’s easy to make and endlessly versatile for creative play. Plus, it’s an affordable way to bring a little extra fun to your Summer Sensory Activities.
So grab your ingredients, mix up a batch of kinetic sand, and let your little paleontologist get to work! Don’t forget to share your creations in the comments. I’d love to see them!
Kinetic Sand Recipe
Equipment
- 1 Mixing Bowl
- 1 Mixing Spoon
- Measuring Cups
Ingredients
- 2 ½ cups fine play sand (any color works!)
- 1 ½ cups cornstarch
- ½ cup vegetable oil
Instructions
- Add 2 ½ cups of play sand and 1 ½ cups of cornstarch into a mixing bowl. Stir well to evenly distribute everything.
- Slowly mix in the ½ cup oil.
- Use your hands to knead the mixture until it’s fully combined and has a soft, moldable texture. If it’s too dry, add a tiny bit more oil. If it’s too wet, sprinkle in a little more cornstarch.
- Let the sensory play begin!
Recommended
- Dino Sensory Bin Using Taste-Safe Chickpea Foam
- How To Make The Best Taste-Safe Kinetic Sand
- How To Make A Kinetic Sand Construction Sensory Bin
- How To Make A DIY Kinetic Sand Ice Cream Sensory Bin
- How To Make a DIY Kinetic Sand Mermaid Sensory Bin
- How To Make A Rock Quarry Contruction Sensory Bin
- 25 Best Summer Sensory Activities For Kids
- 9 Best Ocean Sensory Activities For Kids
- 4 Recipes: How To Make Taste-Safe Sensory Mud And Dirt
- 18 Recipes: The Best DIY Sensory Bin Fillers