How To Make Lemonade Colored Rice Sensory Bin
Create a Fun Lemonade Colored Rice Sensory Bin for Summer! This easy, budget-friendly, activity will keep your kids entertained with creative play ideas and summer fun!
Always supervise children during sensory play. See full disclaimer here. This post may contain affiliate links, which means I may earn a small commission if you make a purchase through these links, at no extra cost to you. As an Amazon Associate, I earn from qualifying purchases. I only recommend products I personally use and love! You can read more about my disclosure policy here.
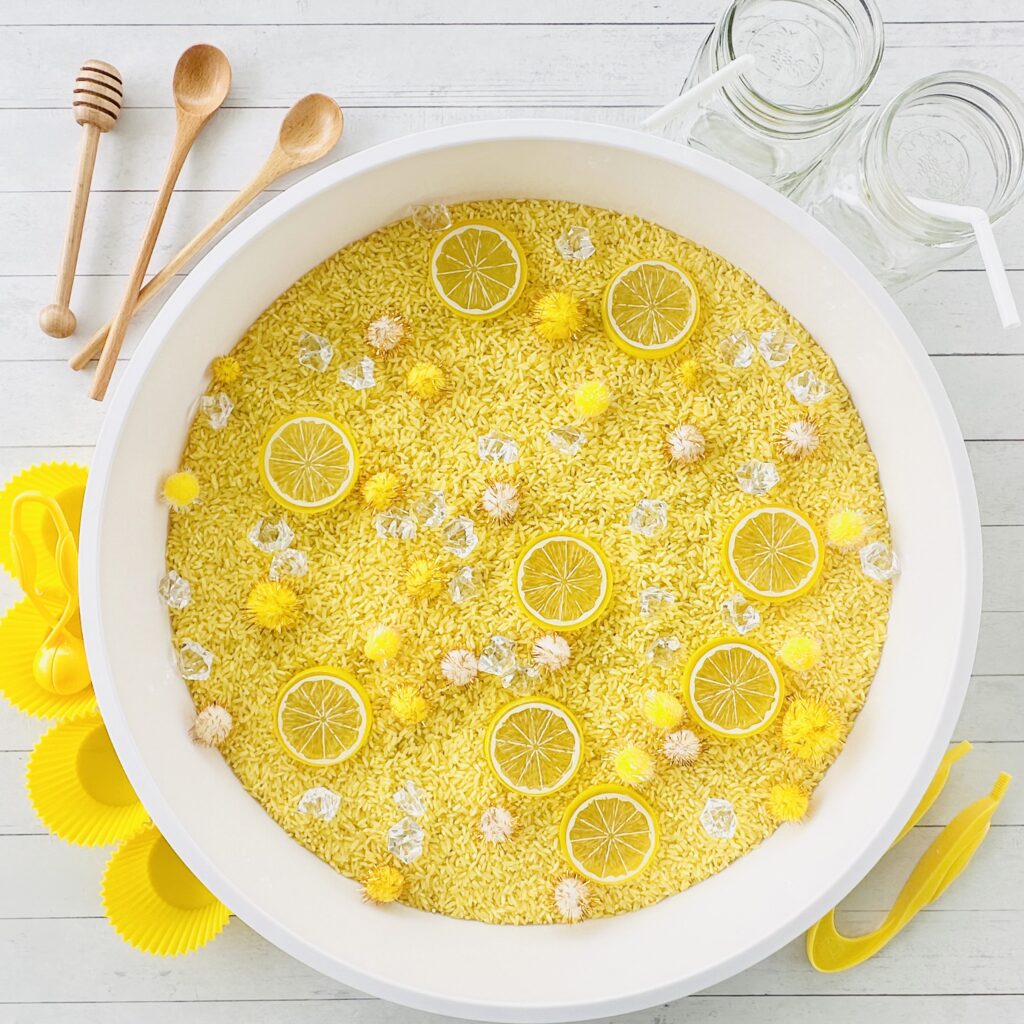
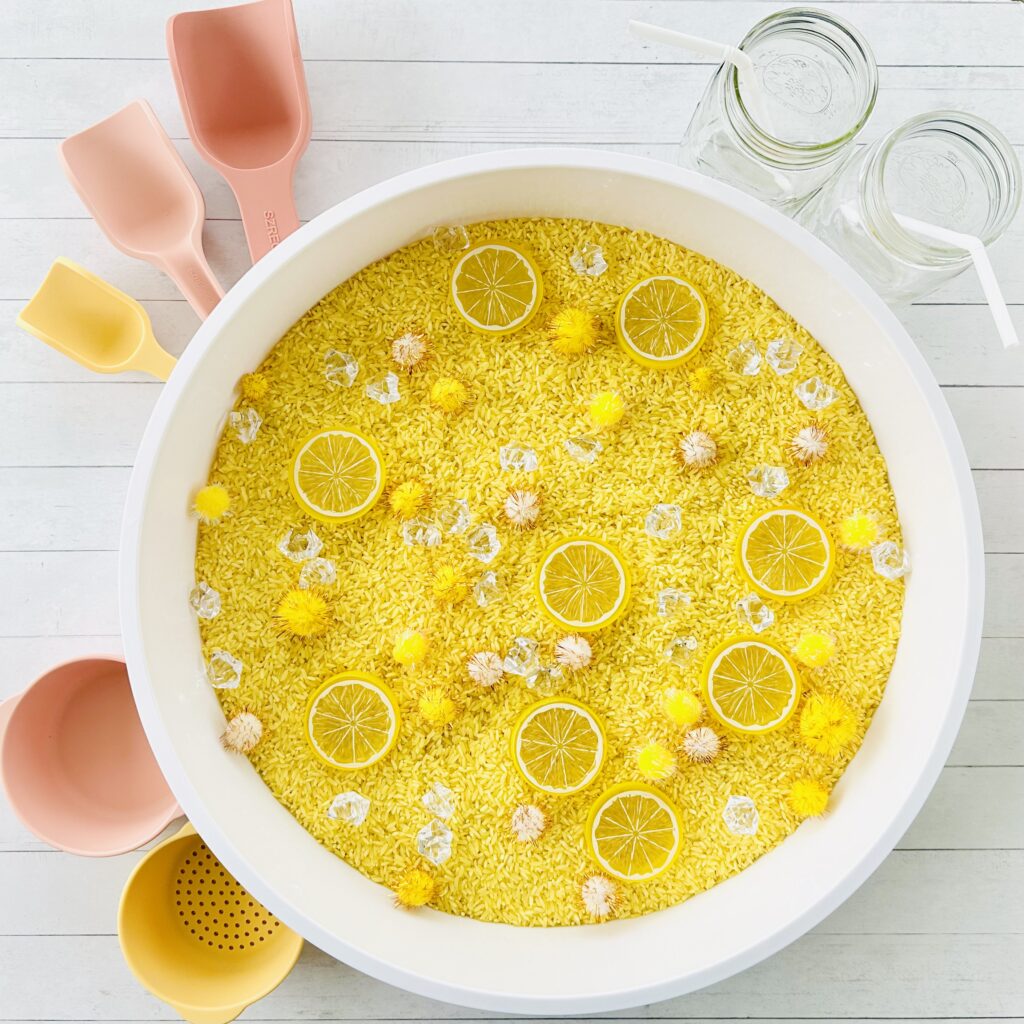
Looking for a fun, easy, and budget-friendly summer activity for the kiddos? Let’s create a bright and cheerful Lemonade Sensory Bin using dyed yellow rice as the base!
This quick and simple activity uses supplies you can grab from Amazon, Target’s Dollar Spot, or the Dollar Store. With the help of some basic household ingredients, you can even dye your own rice for an extra summery touch. The setup is so easy!
Why Make A Lemonade Sensory Bin?
Sensory bins are always a hit because they’re inexpensive, easy to set up, and kids absolutely love them! Using dyed yellow rice as a base adds a bright, summery vibe that’s perfect for a pretend-play lemonade stand. It’s great for scooping, pouring, and digging, plus it provides a smooth, crunchy texture kids enjoy.
Add some lemonade-themed toys, and you’ve got a bin full of sunny fun! Summer sensory activities like this help kids engage with the summer theme, build special memories, and enhance their imaginative play skills.
The Best Lemonade Colored Rice Sensory Bin
What You’ll Need
Before you get started, make sure you have everything prepped and ready to go. The great thing about this lemonade rice sensory bin is how customizable it is, so you can get creative with what you have on hand. I linked what we used from Amazon.
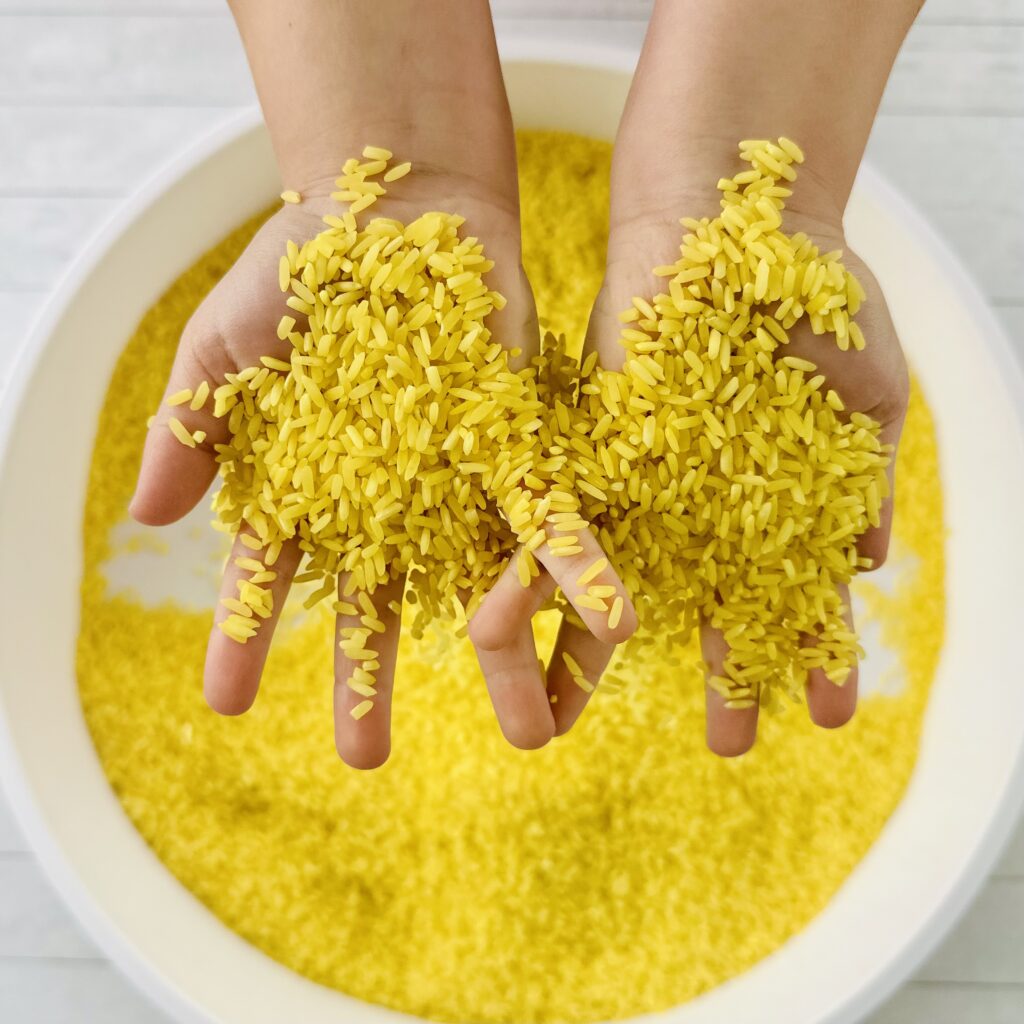
- Colored Rice: You can either make it at home (which I’ll show you how to do in a sec!) or buy colored rice. It’s just as fun to make it as it is to play with it!
- Lemonade-Themed Trinkets: Think lemon slices and gems, cups or mason jars, straws, pom-poms, or any lemonade stand-themed toys and trinkets.
- Silicone Cupcake Liners or Small Bowls
- Scoops and Funnel or Tongs and Tweezers or Spoons
- Sensory Bin (or any container big enough for your child to play in)
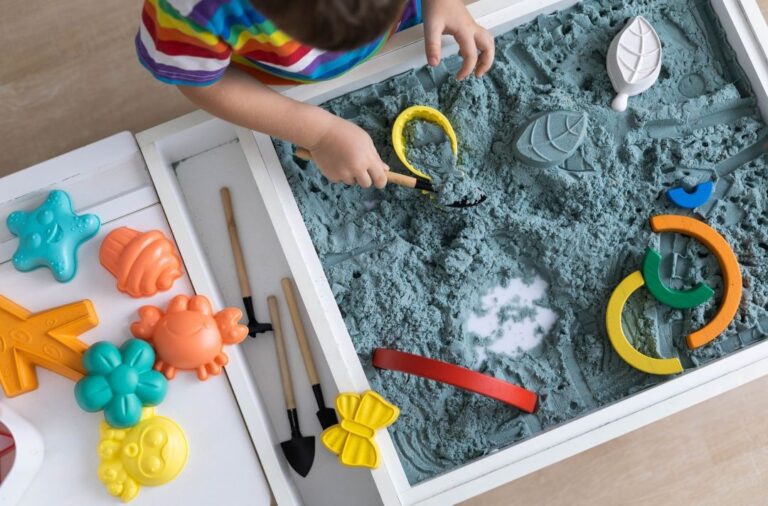
Pro Tip: This sensory bin uses Colored Rice as the filler. But if you don’t have rice or want to switch it up, other fillers like Kinetic Sand, Colored Chickpeas, Colored Pasta, Taste-Safe Kinetic Sand, Moon Dough, Cloud Dough or Edible Play Dough work great too! Click the links for step-by-step instructions to make your own.
Check out our blog post about Essential Sensory Bin Supplies to have on hand, making it easy to set-up multiple different sensory bins in seconds!

How to Dye Rice (Quick and Easy!)
If you’ve never dyed rice before, you’re in for a treat! It’s SO simple, budget friendly, and takes only a few minutes to prep. Plus, it adds a fun sensory experience before the bin even comes together.
Check out our post on How To Make Colored Rice with step-by-step directions, along with helpful tips and tricks for dying rice. Here’s a short version for how you can whip up a batch in no time:
1. Grab some uncooked rice
Go with the budget-friendly kind! You’ll need about 6-8 cups total, depending on the size of your bin.
2. Add food coloring
Divide the rice into ziplock bags, one for each color you want. Squirt a few drops of food coloring into each bag along with a teaspoon of white vinegar or rubbing alcohol per 1 cup of rice (this helps the color set).
3. Shake it up!
Shake the bags. Let your kids help shake them—this part is really fun! Shake until all the rice is evenly coated in bright color.
4. Spread out the rice to dry
Lay the colored rice on a parchment paper or a baking sheet to dry. It usually takes about 1-2 hours to fully dry, but it’ll be good to go once it feels nice and dry to the touch.
Now, you have beautiful dyed rice! You can store it in an airtight container and use it over and over again for different activities.
How to Set Up Your Lemonade Rice Sensory Bin
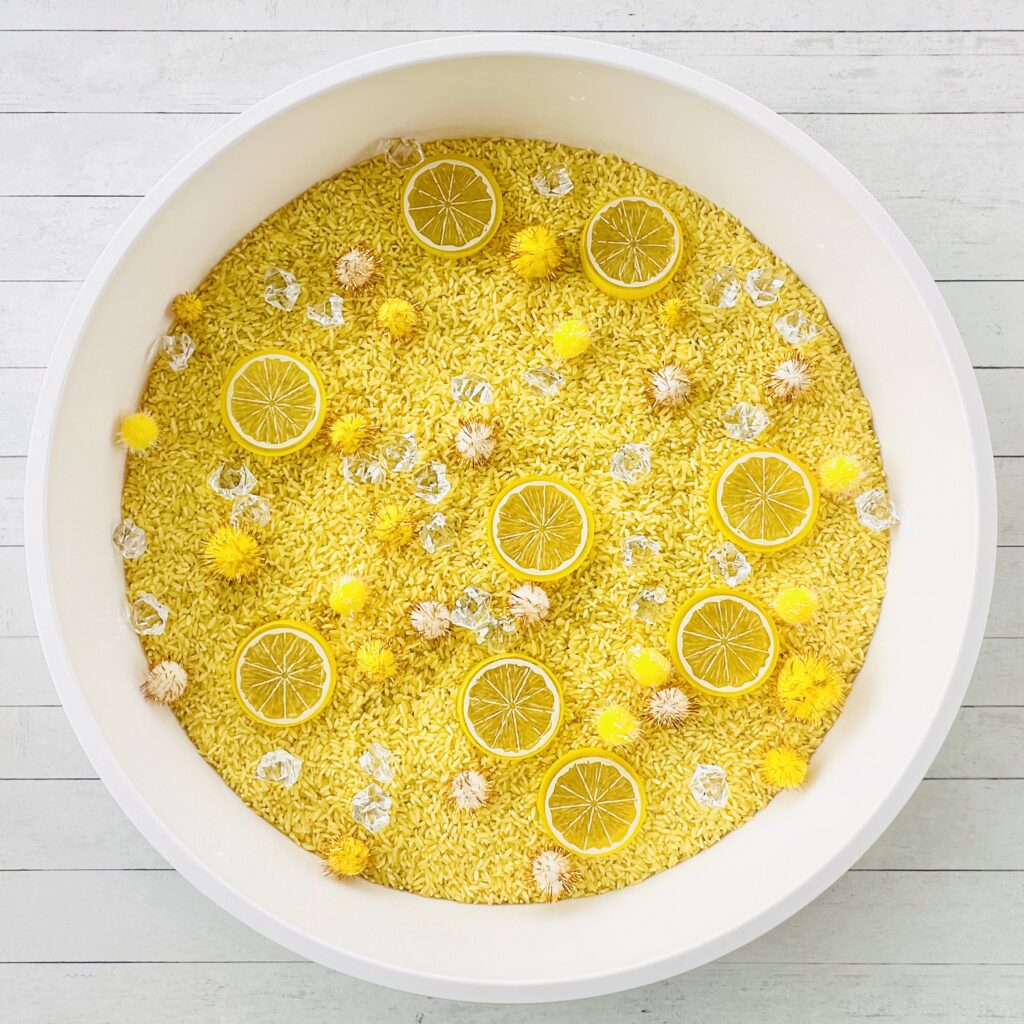
1. Fill the Bin
Start by pouring the dyed yellow rice into your large container or sensory bin. Spread it out evenly, making sure to cover the entire base of the bin. The bright yellow colors will instantly create a summery lemonade vibe.

2. Add Lemonade Trinkets
Next, it’s time to scatter the lemonade-themed trinkets like lemon slices, pom-poms, and gems into the rice. Hide some toys deeper while keeping others visible to create an element of surprise and discovery.
3. Add Scoops and Tongs
To make the bin even more interactive, toss in some scoops, tongs, bowls, and funnels. These tools encourage kids to practice fine motor skills as they scoop up the rice, use tongs to pick out lemonade stand toys, or pour rice into bowls.
4. Let Them Play
Now that everything is set up, sit back and watch your kids dive into the summer sensory fun! They’ll enjoy exploring the textures, sounds, and sights of the bin as they dig, pour, and scoop their way through the rice.

I buried some items into the rice and the kids enjoyed using tweezers to find and sort the items into the bowls and silicone cupcake liners. After most of the items were sorted, they used the jars and trinkets to make their own lemonade creations.

Creative Play Ideas for Your Lemonade Sensory Bin
Once the sensory bin is set up, here are a few extra activities to keep the fun going:
1. Lemon Hunt
Bury the lemon slice toys in the rice. Challenge your child to find all the lemon slices using their tweezers, scoops, tongs, or even their hands. Have them count the slices or sort them by size for an extra activity.
2. Lemonade Mixing Station
Set up a “Lemonade Mixing” station by including lemonade stand items like small jars, cups, scoops, pom-poms, gems, and straws. Encourage your child to scoop the rice and mix in the items to create their own pretend lemonade stand.
3. Scoop and Pour
Include measuring cups, scoops, funnels, and small bowls in the sensory bin for a classic scoop-and-pour activity. Kids can practice transferring the rice from one container to another, experimenting with quantities and different tools.
Why We Love This Lemonade Sensory Bin
What’s not to love about this Lemonade rice sensory bin? It’s super easy to set up, budget-friendly, and reusable all summer long. Once playtime is over, just store the rice and toys in a separate bag, and you’re ready to go again for the next pretend-play lemonade stand. It’s a fun way to create lasting memories with minimal effort!
Whether your kids are on a lemon hunt or mixing up a pretend lemonade drink, this sensory bin is sure to be a hit!

Colored Rice Recipe
Equipment
- Zip-top Bag or Container with Lid
- Parchment Paper or Baking Sheet
- Measuring Cups
- Measuring Spoons
Ingredients
- 1 cup uncooked white rice
- 1 tsp vinegar or rubbing alcohol
- Food coloring
Instructions
- Place 1 cup of uncooked rice into a zip-top bag or container with lid.
- Add in 1 tsp of vinegar or rubbing alcohol and a few drops of food coloring to the rice.
- Seal the bag and shake until rice is evenly colored.
- Spread the rice on parchment paper or baking sheet in a thin layer and let it dry.
- Once dry, store the rice in an airtight container for future use!
Notes
Recommended
- 25 Best Summer Sensory Activities For Kids
- How To Make Lemonade Slime (No Borax!)
- How To Make A Watermelon Moon Sand Sensory Bin
- How To Make A Watermelon Colored Rice Sensory Bin
- How To Make A Mermaid Colored Rice Sensory Bin
- How To Make Taste-Safe Ocean Moon Dough
- How To Make An Ocean Colored Rice Sensory Bin
- How To Make A Coral Reef Sensory Bin
- How To Make A Chickpea Sensory Foam Ocean
- 9 Best Ocean Sensory Activities For Kids