How To Make A Watermelon Moon Sand Sensory Bin
Create this Watermelon Moon Sand Sensory Bin made with just 2 simple ingredients: flour and baby oil! The perfect sensory play activity for kids of all ages!

Always supervise children during sensory play. See full disclaimer here. This post may contain affiliate links, which means I may earn a small commission if you make a purchase through these links, at no extra cost to you. As an Amazon Associate, I earn from qualifying purchases. I only recommend products I personally use and love! You can read more about my disclosure policy here.
Summer is the perfect time to add a little extra fun and creativity to your sensory play. And if you’re like me, you want something easy, hands-on, and engaging for curious kiddos who love to dive into texture-rich activities.
Enter this watermelon moon dough recipe: a super simple sensory activity that’s soft, squishy, and irresistibly fun to play with. With just a few basic ingredients and some optional watermelon-themed add-ins, you’ll have a bright, summer-inspired activity ready in no time! We use crushed sidewalk chalk to give it that perfect watermelon color—no food coloring needed!
Why This Moon Sand Recipe Is Awesome
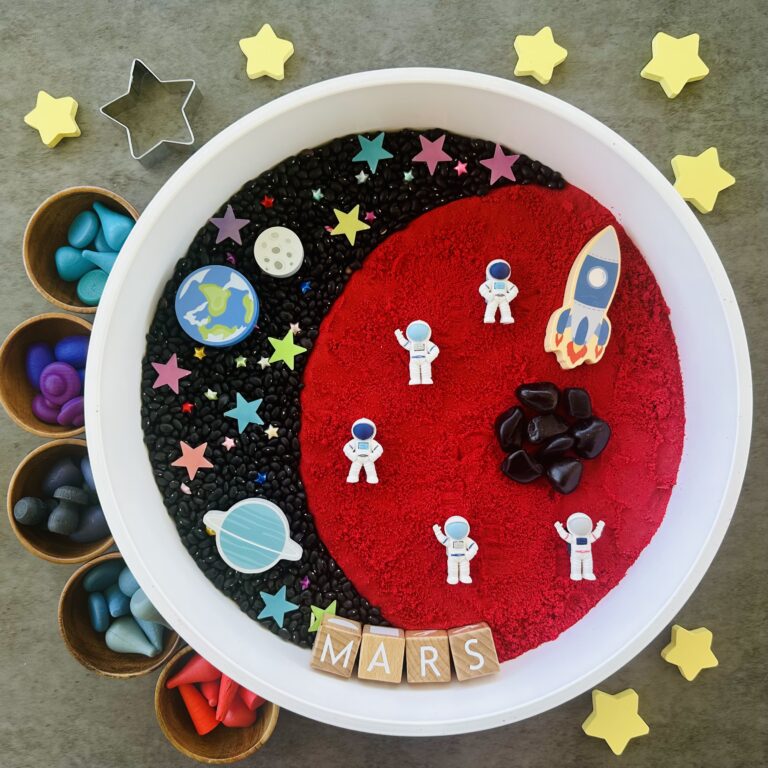
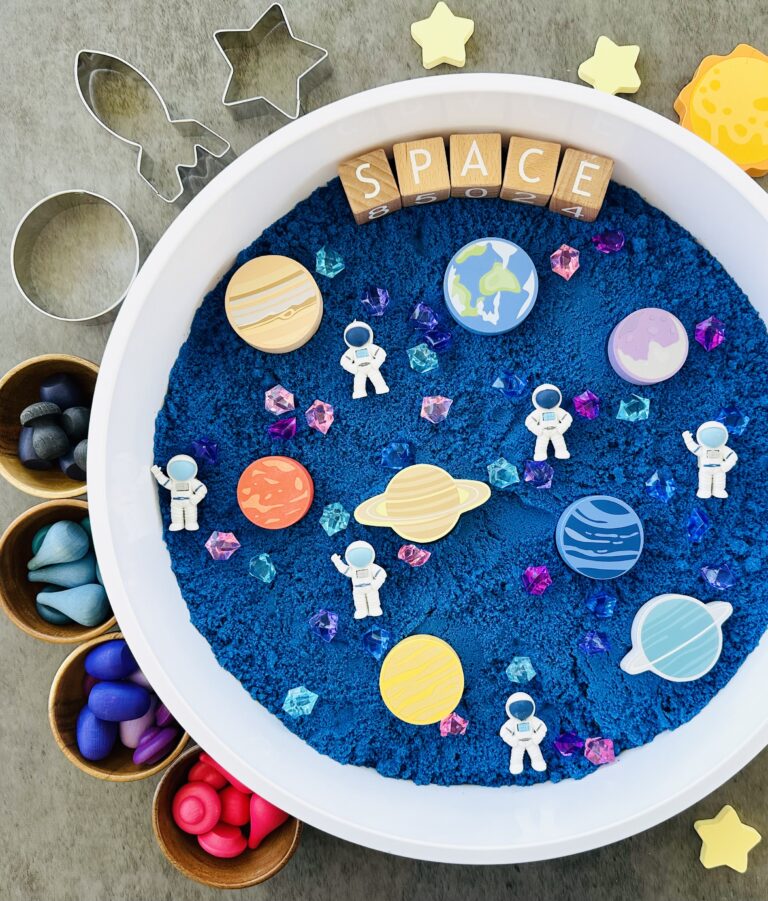
If you’ve never tried moon sand before, get ready for a sensory treat. It’s soft, fluffy, and silky to the touch but holds its shape when pressed. It’s like kinetic sand but fluffier. And for summer, we’re giving it a fun watermelon twist with red hues made from crushed chalk and playful themed accessories that make this sensory bin feel extra special!
This version uses baby oil, which makes it not safe for those kiddos who are still exploring the world by tasting it! If you’re making moon sand for babies or little ones who might sneak a bite, click here for our blog post on How to Make Taste-Safe Moon Sand — it includes a vegetable oil version with tips on making flour taste-safe for small kiddos.
How To Make Watermelon Moon Sand

What You’ll Need
Here’s everything you’ll need to whip up your own batch of watermelon moon sand:
- 6 cups all-purpose flour: This is the base of your moon sand. It gives the dough its soft, fluffy texture. Any type of flour works.
- 1 cup Baby Oil or Vegetable Oil: This is what makes the dough moldable and gives it that silky feel.
- Crayola Sidewalk Chalk (optional): If you want to add a pop of color.
- Dried Black Beans or Black Pom-Pom Balls (optional): These make perfect “watermelon seeds” for added fun.
- Pastry Cutter (optional): This helps work the oil into the flour evenly.
- Wooden Loose Parts Sensory Bin Filler, Watermelon Toys, Cookie Cutters, or othe small toys and trinkets for creative play.
- Small Bowls and Spoons
- Sensory Bin (or any container big enough for your child to play in).
Instructions
Step 1: Add The Flour
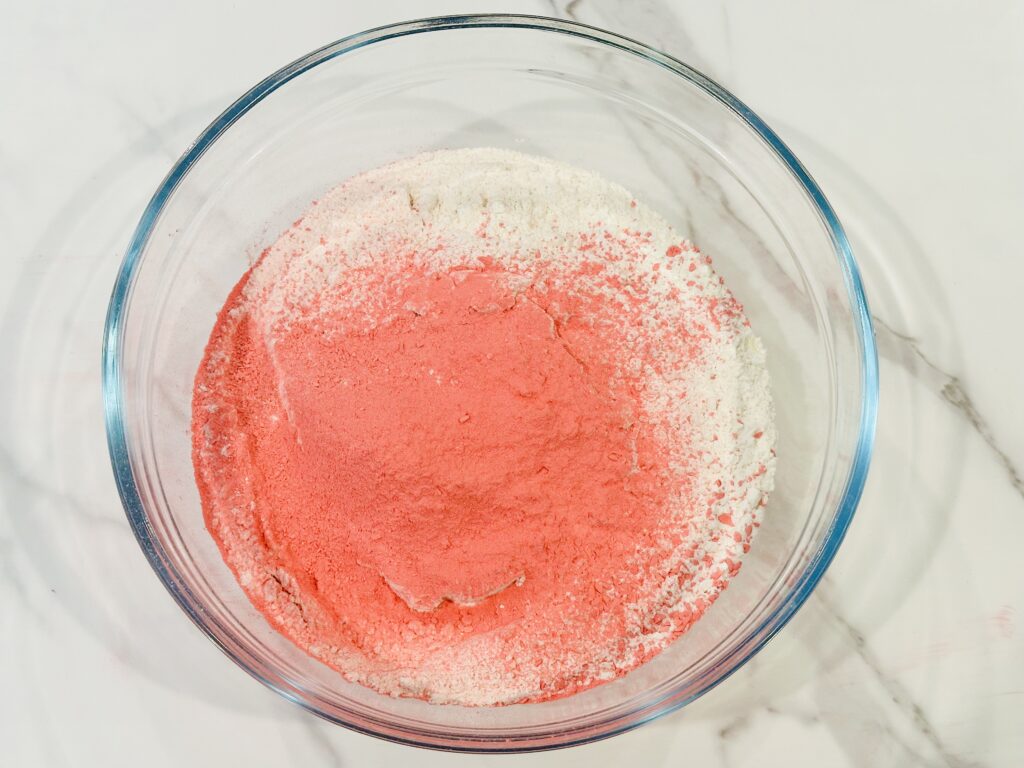
Start by measuring 6 cups of all-purpose flour and pouring it into a large mixing bowl. This will be the base of your moon sand, so make sure you have enough room to mix everything easily.

Step 2: Add Some Color
To get that perfect watermelon hue, grate a stick of red sidewalk chalk directly into the flour. We used a cheese grater to turn the chalk into fine powder, but you can also pop the chalk into a plastic bag and crush it with a hammer or rolling pin—whatever works!
Prefer food coloring instead? You can mix oil-based food coloring into the oil before adding it to the flour. Just be generous with the color, since it will lighten once it’s blended with the white flour.

Step 3: Mix It Up
In a large mixing bowl, slowly drizzle the 1 cup of oil over the 6 cups of flour and stir with a mixing spoon. Don’t worry if it’s not perfectly mixed yet. You’ll get there!

Step 4: Knead The Moon Sand
Now it’s time to get hands-on. Use a pastry cutter or your hands to really work the oil into the flour until it’s soft, silky, and evenly colored (if you added food coloring). I ended up using my hands to fully combine the ingredients. You want the oil to be fully blended into the flour for that perfect texture.

Step 5: Test the Texture
Scoop up a handful and squish it. If it holds its shape, you’re good to go! Too dry? Add a little more oil, a tablespoon at a time. Too wet? Sprinkle in more flour.


Playtime!
Once it’s ready, transfer the moon sand to a bin or shallow container. Now’s the time to get creative! Toss in black dried beans or pom-pom balls as “watermelon seeds,” gems, or any watermelon themed toys and let the sensory fun begin!

My kids had a blast scooping, shaping, and molding the dough. It’s perfect for creating little sandcastles or just letting those tiny fingers explore the texture.


Creative Play Ideas For Your Watermelon Moon Sand
You can do so many things with this watermelon moon sand! Don’t be surprised if your little one spends a solid 20 minutes just running their fingers through the sand. It’s that satisfying! Want to take it up a notch? Here are a few ideas:
1. Watermelon Bakery
Turn your kitchen into a pretend watermelon dessert shop! With silicone muffin liners, cookie cutters, and small bowls, kids can shape moon sand into “cupcakes” or “cookies.”
2. Watermelon Creations
Use cookie cutters or shape the dough by hand into fun watermelon slice designs. Kids can press in black pom-pom balls or beans for “seeds.”
3. Sensory Treasure Hunt
Bury small watermelon-themed trinkets in the dough and let your kids dig them out using scoops or tweezers. It’s a fun surprise element that keeps them engaged!

Tips for Making the Most of Your Watermelon Moon Sand
Why We Love This Watermelon Moon Sand
This watermelon moon sand recipe is a hit for kids of all ages. It’s easy to make and endlessly versatile for creative play. Plus, it’s an affordable way to bring a little extra fun to summer sensory activities.
So grab your ingredients, mix up a batch, and let the summer fun begin! Don’t forget to share your creations in the comments. I’d love to see them!

Moon Sand Recipe
Equipment
- 1 Mixing Bowl
- 1 Mixing Spoon
- Measuring Cups
Ingredients
- 6 cups all-purpose flour
- 1 cup baby oil or vegetable oil
- 1 piece sidewalk chalk optional for a pop of color
Instructions
- Measure 6 cups of all-purpose flour into a large mixing bowl.
- Grate a stick of sidewalk chalk directly into the flour.
- Slowly drizzle the 1 cup of oil over the flour and stir.
- Use a pastry cutter or knead with hands until the dough feels like soft, powdery sand.
- Transfer the moon sand to a sensory bin and add sensory tools and toys. Let them play!
Recommended
- 25 Best Summer Sensory Activities For Kids
- How To Make A Watermelon Colored Rice Sensory Bin
- How To Make A DIY Kinetic Sand Watermelon Sensory Bin
- How To Make Awesome Summer Watermelon Slime
- How To Make An Erupting Watermelon Volcano
- How To Make A Mermaid Colored Rice Sensory Bin
- How To Make Lemonade Colored Rice Sensory Bin
- How To Make A Colorful Kinetic Sand Mermaid Sensory Bin
- How To Make a DIY Coral Reef Mermaid Sensory Bin
- How To Make Taste-Safe Ocean Moon Dough
- How To Make An Ocean Colored Rice Sensory Bin
- How To Make A Coral Reef Sensory Bin
- How To Make A Chickpea Sensory Foam Ocean
- The Best Ocean Sensory Activities For Kids