How to Make DIY Easter Sensory Bottles
Create these three awesome DIY Easter Sensory Bottles: Butterfly, Easter Bunny Hunt, and Pom-Poms! Sensory play perfect for toddlers, preschoolers, and older kids.

Always supervise children during sensory play. See full disclaimer here. This post may contain affiliate links, which means I may earn a small commission if you make a purchase through these links, at no extra cost to you. As an Amazon Associate, I earn from qualifying purchases. I only recommend products I personally use and love! You can read more about my disclosure policy here.
Easter is the perfect time to get creative with fun, hands-on activities that keep little ones entertained and engaged. And what better way to celebrate the season than with DIY Easter Sensory Bottles?
These mesmerizing bottles are easy to make and are a fantastic tool for calming, focus, and sensory exploration.
Whether you’re setting up an Easter-themed activity, looking for a chocolate-free alternative for Easter basket stuffers, or just want a fun and simple DIY project, these sensory bottles are a must-try!
Why Easter Sensory Bottles Are Awesome
Easter Sensory Bottles are a fantastic Easter sensory activity for kids! With their swirling glitter, floating pom-pom balls, and vibrant colors, these bottles invite kids to explore their senses in a calming and engaging way.
Plus, holiday-themed sensory play is perfect for sparking creativity. Your kids can shake, twist, and roll their bottles, watching how the glitter and objects move inside.
Easter Sensory Bottles are the ultimate mess-free activity to keep little hands busy and happy. Whether it’s for quiet time or a fun craft these bottles bring the magic of the season right to your child’s fingertips!
Plus, they’re a fantastic alternative to sugar-loaded treats, making them a thoughtful addition to Easter baskets.
How to Make Easter Sensory Bottles
What You’ll Need
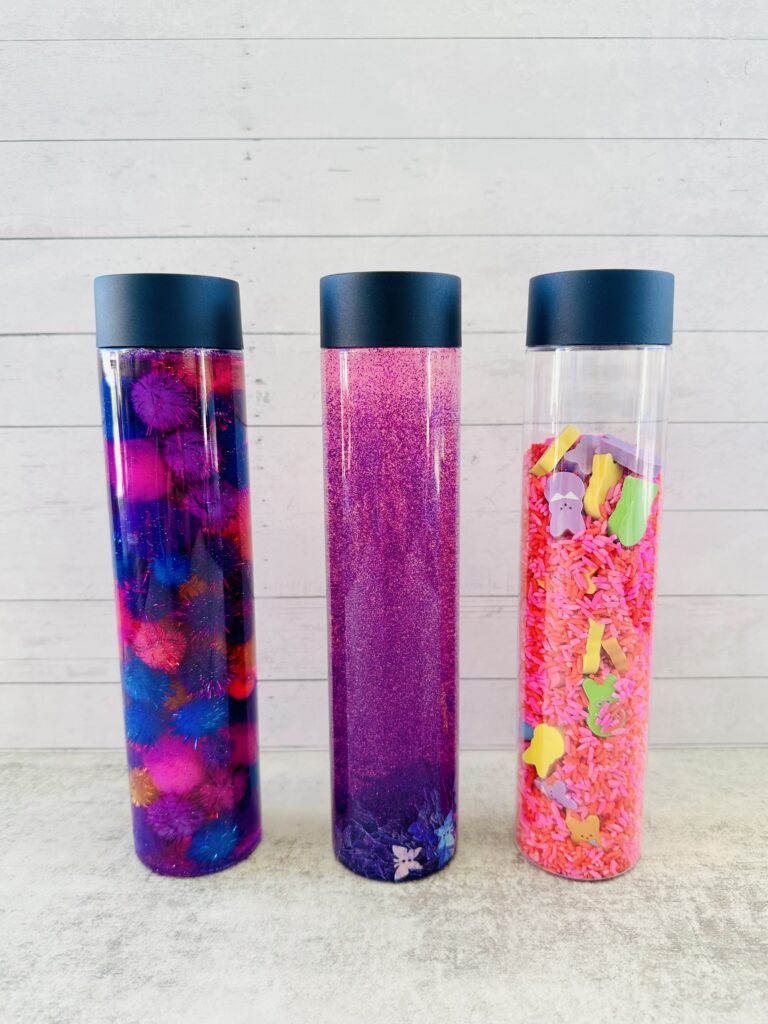
Here’s what you’ll need to make three different types of Easter sensory bottles: Butterfly, Easter Bunny Hunt, and Pom Pom:
- Empty plastic bottles
- Clear glue (about 1/2 cup per bottle)
- Water
- Food coloring or liquid watercolors
- Glitter (fine or chunky, in festive colors)
- Butterfly confetti or Easter-themed confetti
- Small bunny erasers or small Easter-themed trinkets
- Rice (dyed pink for the Bunny Hunt bottle)
- Pom-pom balls
- Hot glue gun or Super glue to secure the lid.
Instructions

1. Butterfly Sensory Bottle
- Fill an empty plastic bottle halfway with water.
- Add 1/2 cup of clear glue.
- Add purple fine glitter and a couple drops of pink food coloring or liquid watercolors.
- Add Butterfly or Easter confetti.
- Fill the bottle with water, leaving about 1/2 inch space at the top so there is room to shake.
- Secure the lid with hot glue or super glue.
- Shake and enjoy watching the glitter float.
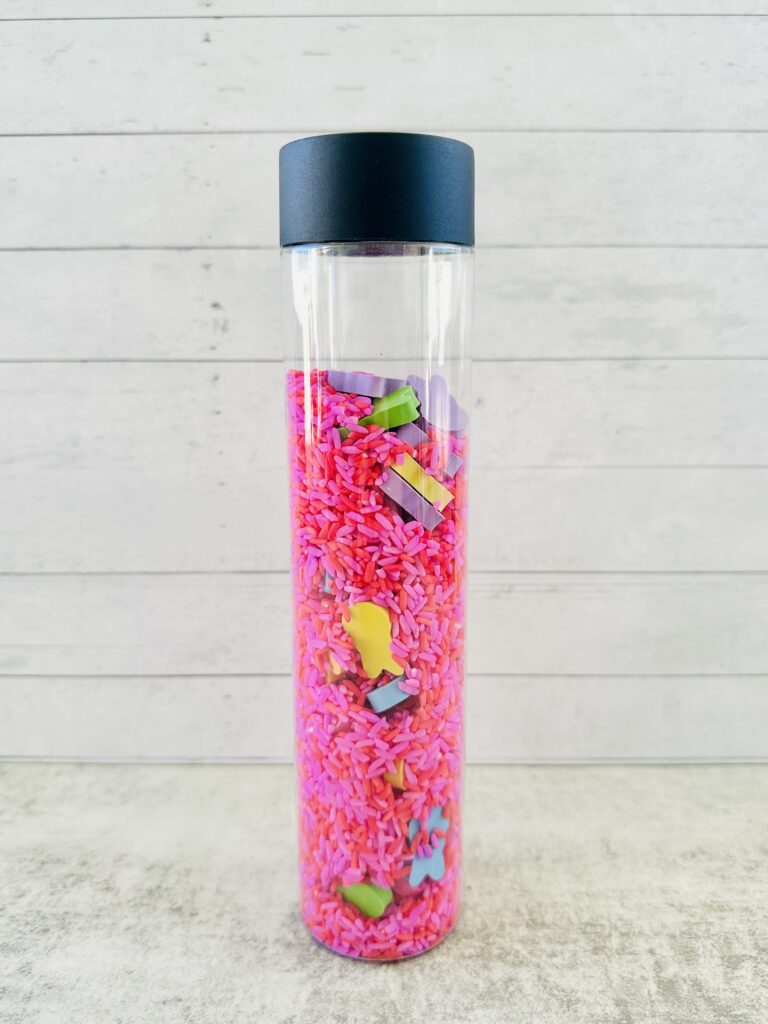
2. Easter Bunny Hunt Sensory Bottle
- Prepare pink rice: Place about 2 cups white rice in a baggie with some pink food coloring or liquid watercolor and a tsp of vinegar or rubbing alcohol. Then shake, shake, shake! Lay flat to dry on parchment paper or a baking sheet. Check out our blog post for tips and tricks on how to make colored rice.
- Fill the bottle about halfway with the dyed pink rice.
- Sprinkle in small bunny erasers or small Easter-themed trinkets. Leave about an inch of space at the top so there is room to shake.
- Secure the lid with hot glue or super glue.
- Shake it up and have fun hunting for the bunnies hidden inside the rice!

3. Pom Pom Sensory Bottle
- Fill an empty plastic bottle with various pink, purple, blue and yellow pom pom balls.
- Add pink fine glitter and a couple drops of pink food coloring or liquid watercolors.
- Fill to the top with water, leaving about 1/2 inch space at the top so there is room to shake.
- Secure the lid with hot glue or super glue.
- Shake it up and watch the pom pom balls swirl around!
You’ll Love These Easter Sensory Bottles
You’ll love these adorable and engaging Easter Sensory Bottles! Whether you’re making these as a festive craft, a calming tool, or a fun activity to enjoy with the kids, they’re sure to bring some Easter joy.
The best part? You can customize them however you like! Try using different colors and fillers for extra fun. So grab your supplies and get crafting. These bottles are too much fun to pass up!
Which one will you make first? Let me know in the comments below!
Recommended
- Awesome Easter Sensory Activities For Kids Of All Ages
- 22 Sensory Easter Basket Stuffer Ideas
- How To Make A Colored Rice Easter Sensory Bin
- How To Make Glitter & Bunnies Easter Slime
- How To Make Edible Easter Moon Dough
- How To Make Edible Easter Playdough
- How To Make Easter Fluffy Slime (No Borax!)
- How To Make Taste-Safe Easter Peeps Slime
- How To Make Easter Chickpea Sensory Foam
- How To Make A Spring Garden Sensory Bin