How To Paint Chickpeas For Sensory Play
Learn how to paint chickpeas for a colorful, jewel-like sensory bin filler! This easy DIY guide shows you the simple steps to make painted chickpeas that kids will love for sensory play!
Always supervise children during sensory play. See full disclaimer here. This post may contain affiliate links, which means I may earn a small commission if you make a purchase through these links, at no extra cost to you. As an Amazon Associate, I earn from qualifying purchases. I only recommend products I personally use and love! You can read more about my disclosure policy here.
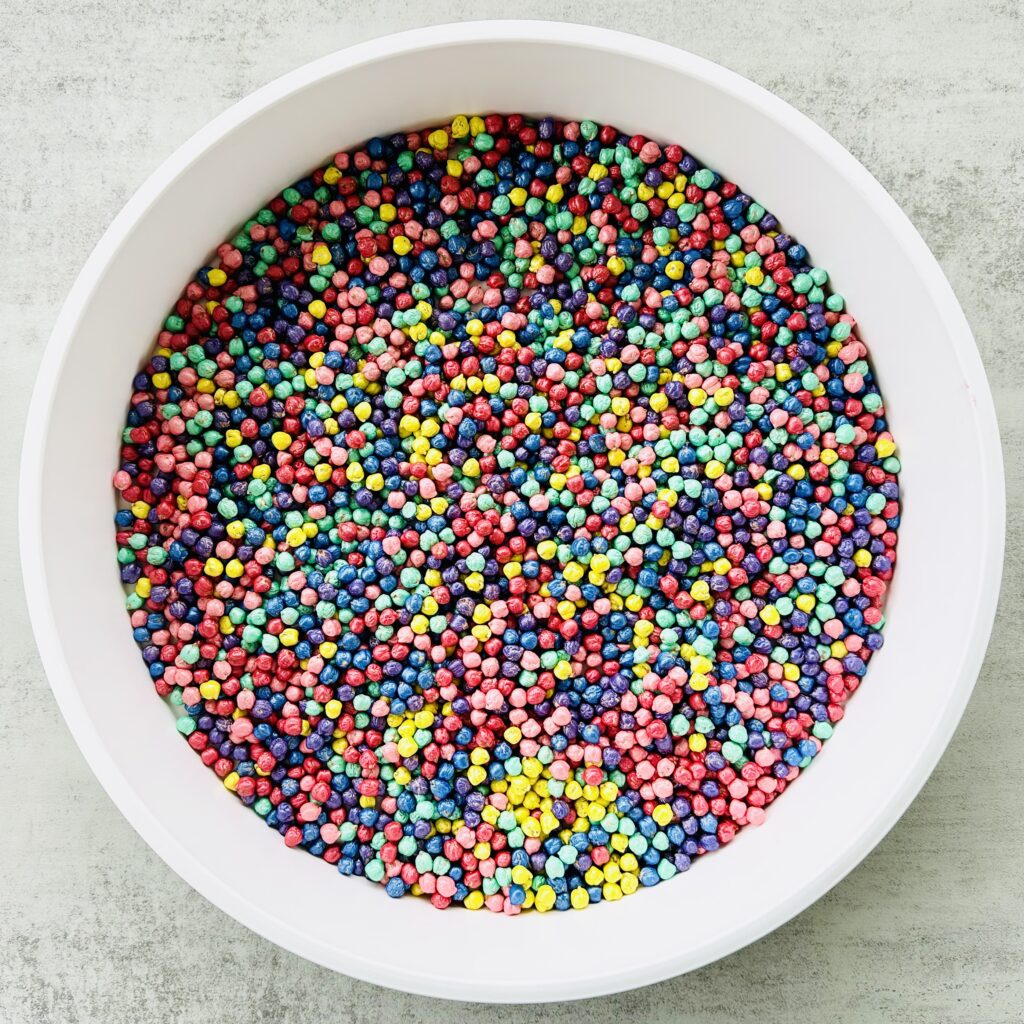
Ever wondered how people get those gorgeous, jewel-like chickpeas for sensory bins? Spoiler, it’s not some fancy craft store find. It’s just plain dried chickpeas and a little bit of paint!
The first time I tried painting chickpeas, it completely leveled up our sensory play. Total game-changer! If you’re dreaming of a sensory bin that’s bold, bright, and just a little bit magical, this is the way to go. Painted chickpeas bring shimmer, sparkle, and color in a way that food dye just can’t replicate. You’ll be hooked after one try.
The best part? It’s ridiculously easy. We used regular acrylic craft paint for those bold pops of color and iridescent acrylic paint for a pearly shimmer that catches the light. Watching the beans transform as you shake and spread them is seriously mesmerizing. It feels like its own sensory activity before play even begins.
And here’s the cool thing: this isn’t the only way to color chickpeas. If you want a taste-safe version, check out my tutorial on How To Dye Chickpeas where we use food coloring. Both methods are fun, but the painted version gives you that shiny, candy-coated look that makes sensory bins feel extra magical.
How to Paint Chickpeas (AKA Garbanzo Beans)
What You’ll Need
Here are the simple supplies to get started:
- Dried chickpeas (also called garbanzo beans)
- Acrylic craft paint (any colors you like, go bright, go pastel, go bold!)
- Iridescent acrylic paint (optional, but amazing for shimmer and shine)
- Plastic Ziplock bags or a container with a lid
- Parchment or wax paper, or a baking sheet (for drying)
Instructions
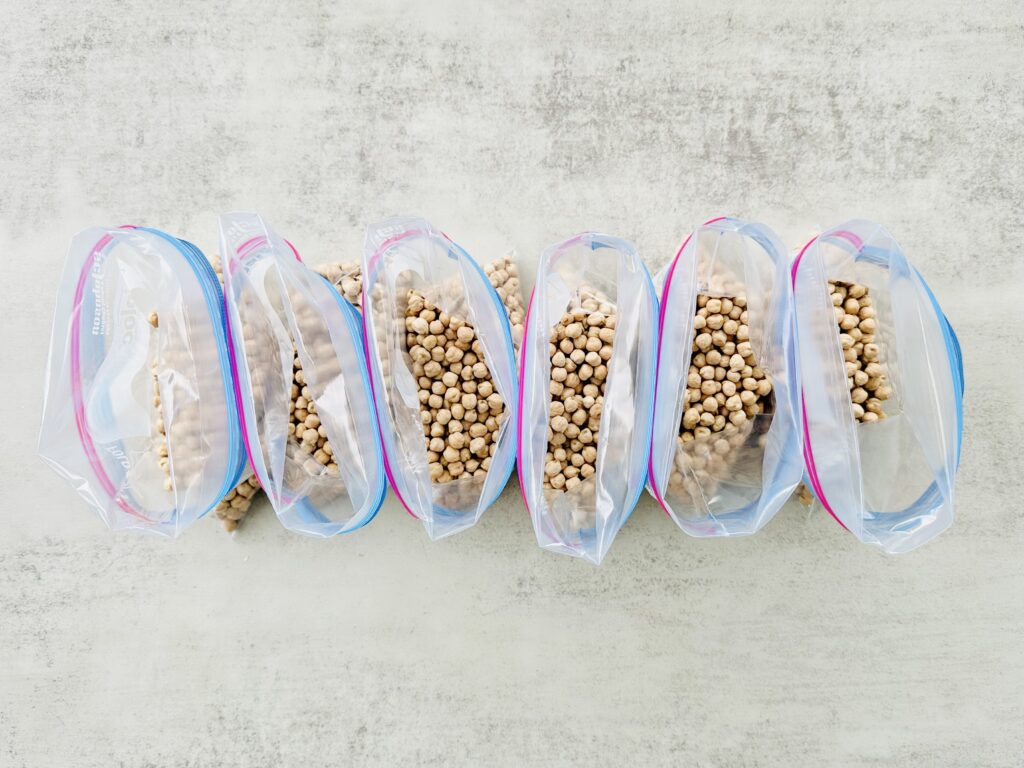
1. Start with Chickpeas
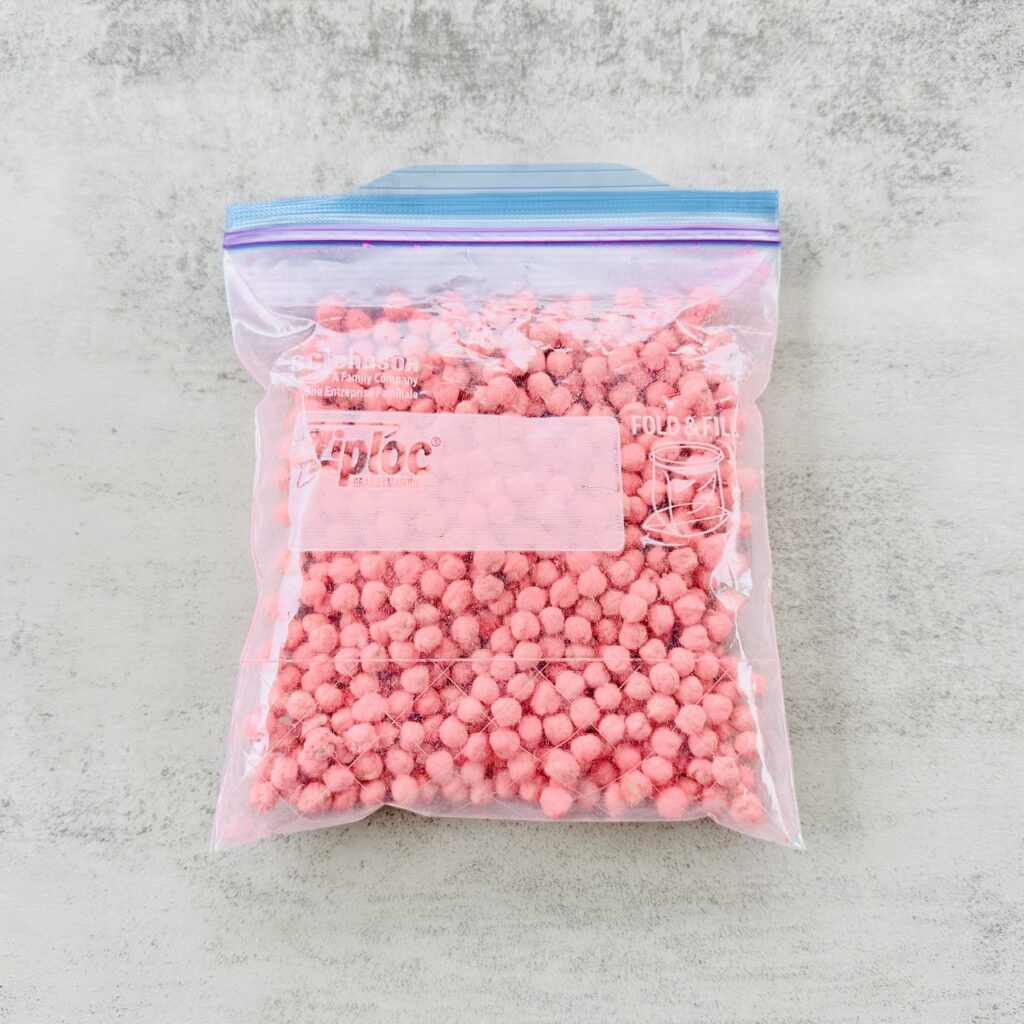
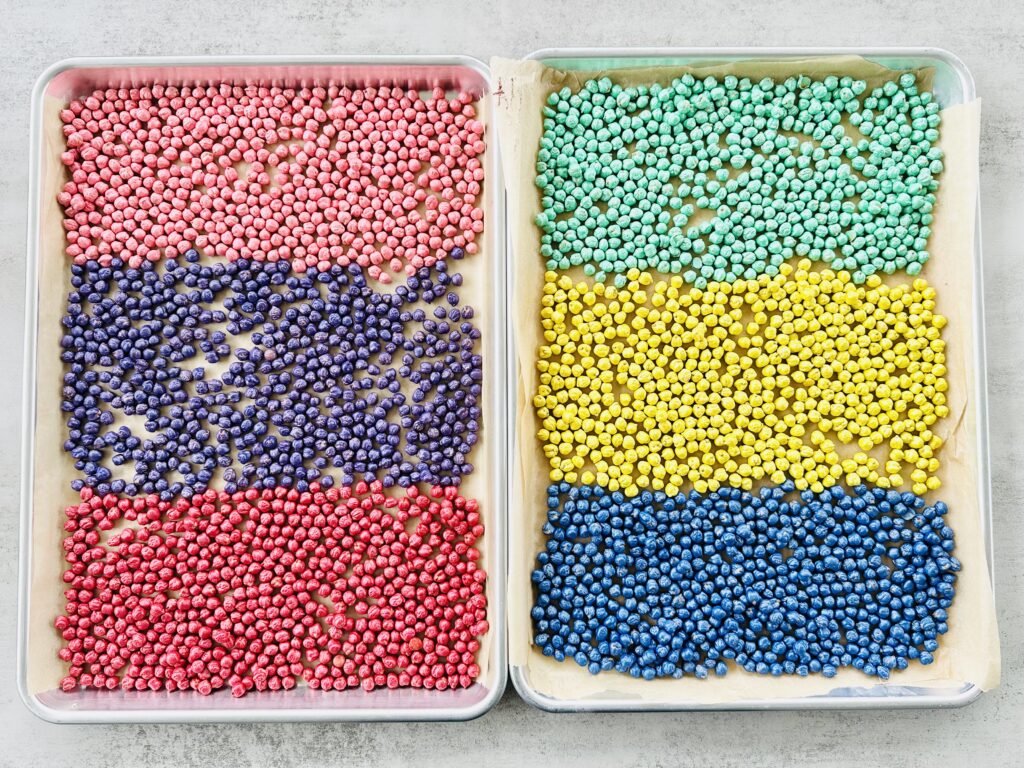
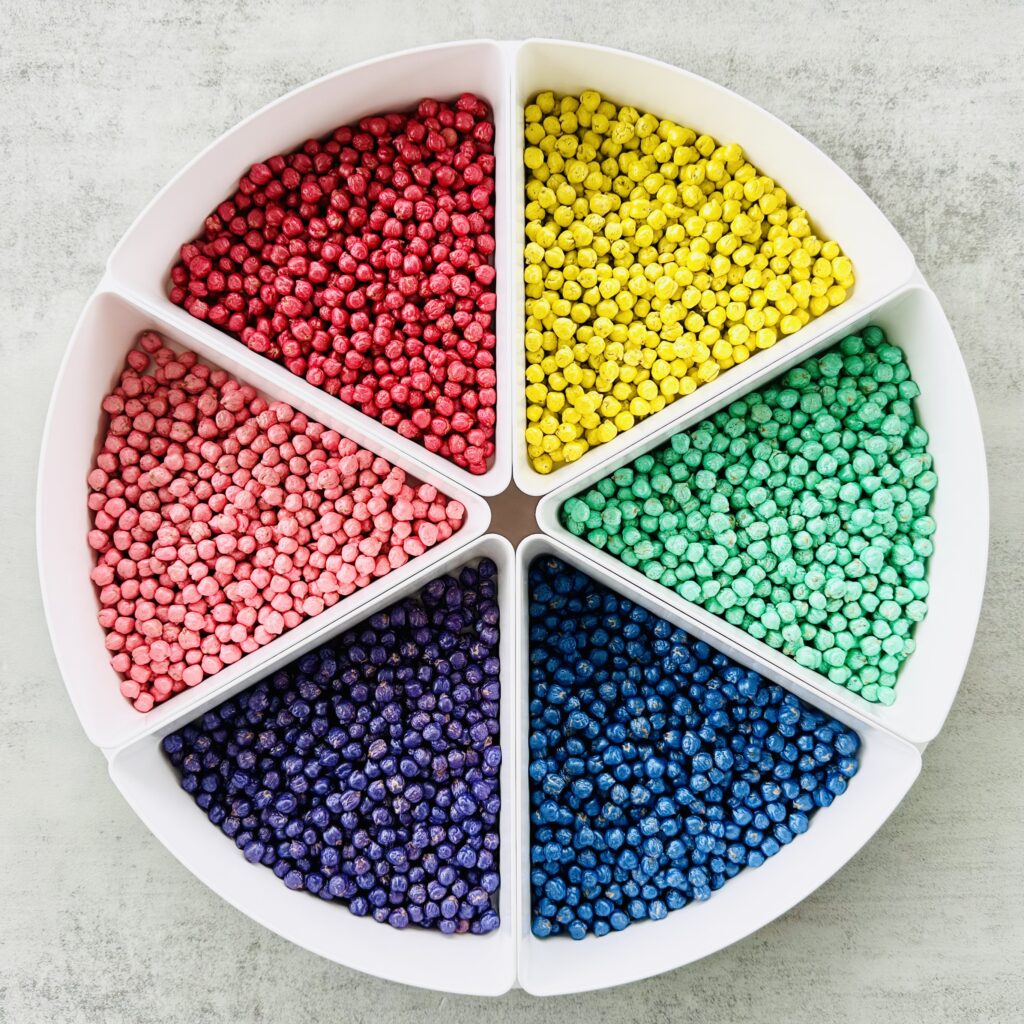
Pour about 1 cup of dried chickpeas into a large Ziplock bag or a container with a lid. We added a cup of chickpeas into 6 separate bags to make multiple colors.
2. Add Your Color
Add in a squirt of acrylic craft paint (about ½ tablespoon) per cup of chickpeas (or more if you want super bold coverage). For multiple colors, repeat for each bag.
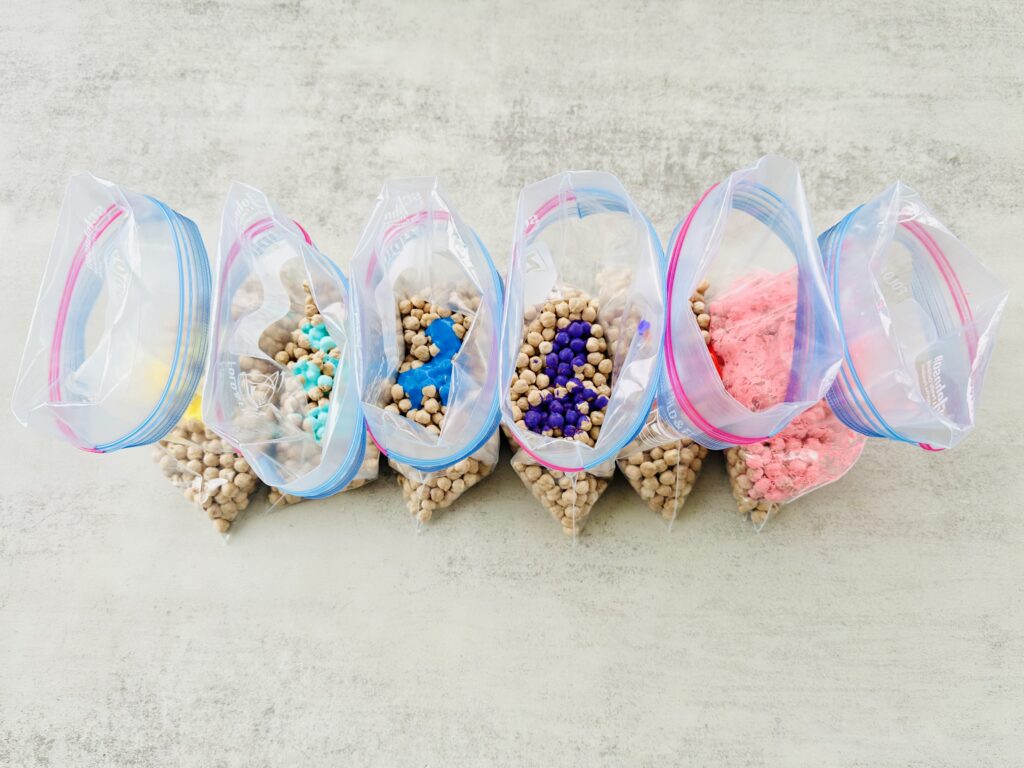
3. Shake It Up
Seal the bag and give it a good shake! (This is a great part to do with your kids. They love watching the chickpeas magically change color.) You can also mix them with a spatula if you’re using a container with a lid.
4. Add Iridescent Paint (Optional)
For a sparkly, pearly finish, add a squirt of iridescent acrylic paint into the bag. Seal it up again and give it another good shake to blend the shimmer over the color.
5. Dry Time
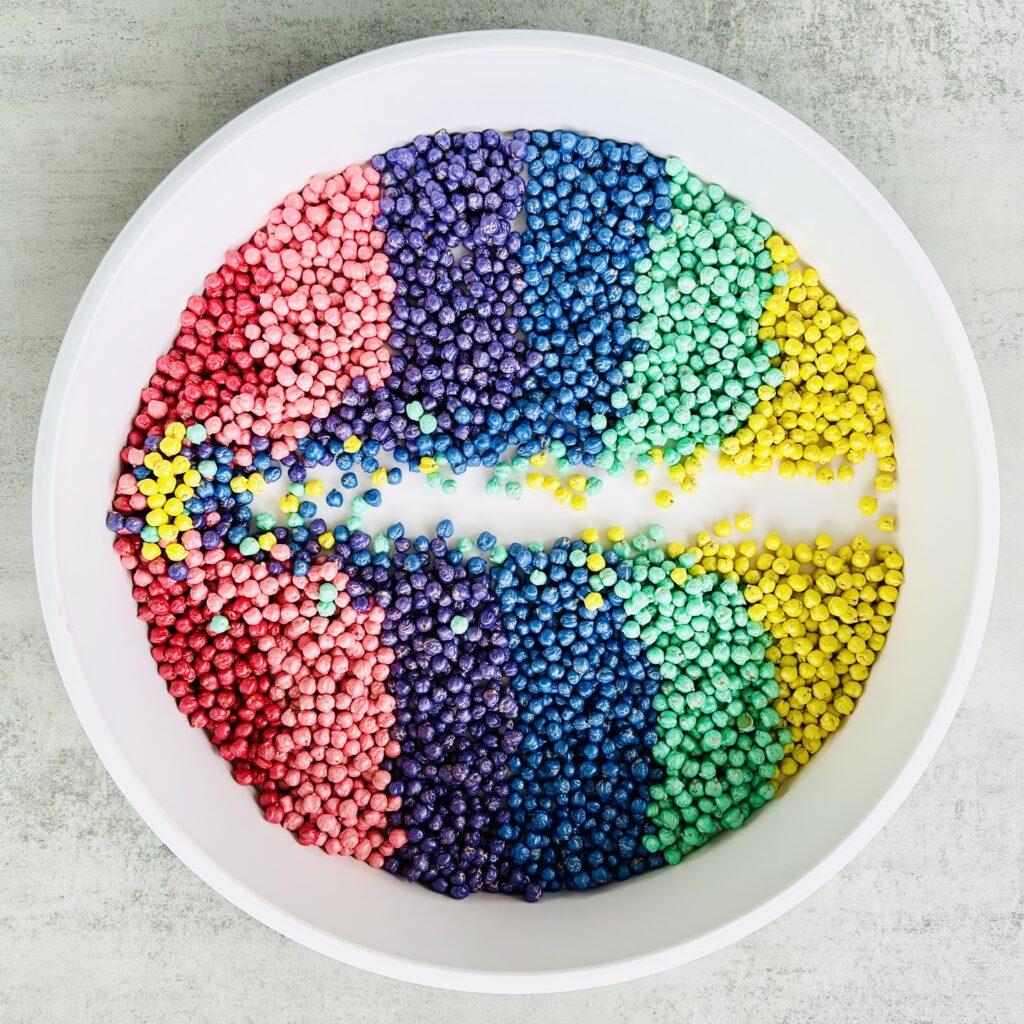
Spread the painted chickpeas out in a single layer on parchment paper or a baking sheet. Let them dry completely. They dry pretty quickly (usually less than an hour) depending on how much paint you used. Give them a little stir while drying so they don’t stick together.
6. Play!
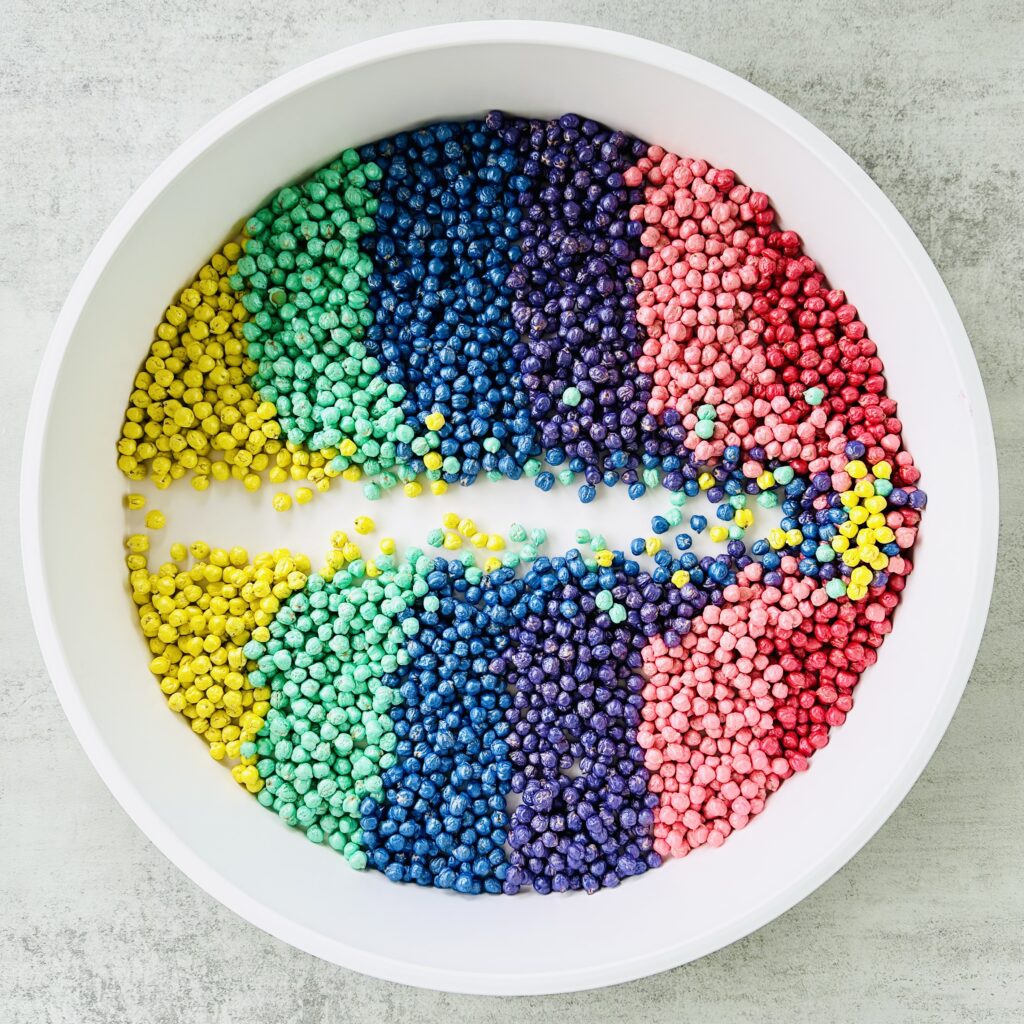
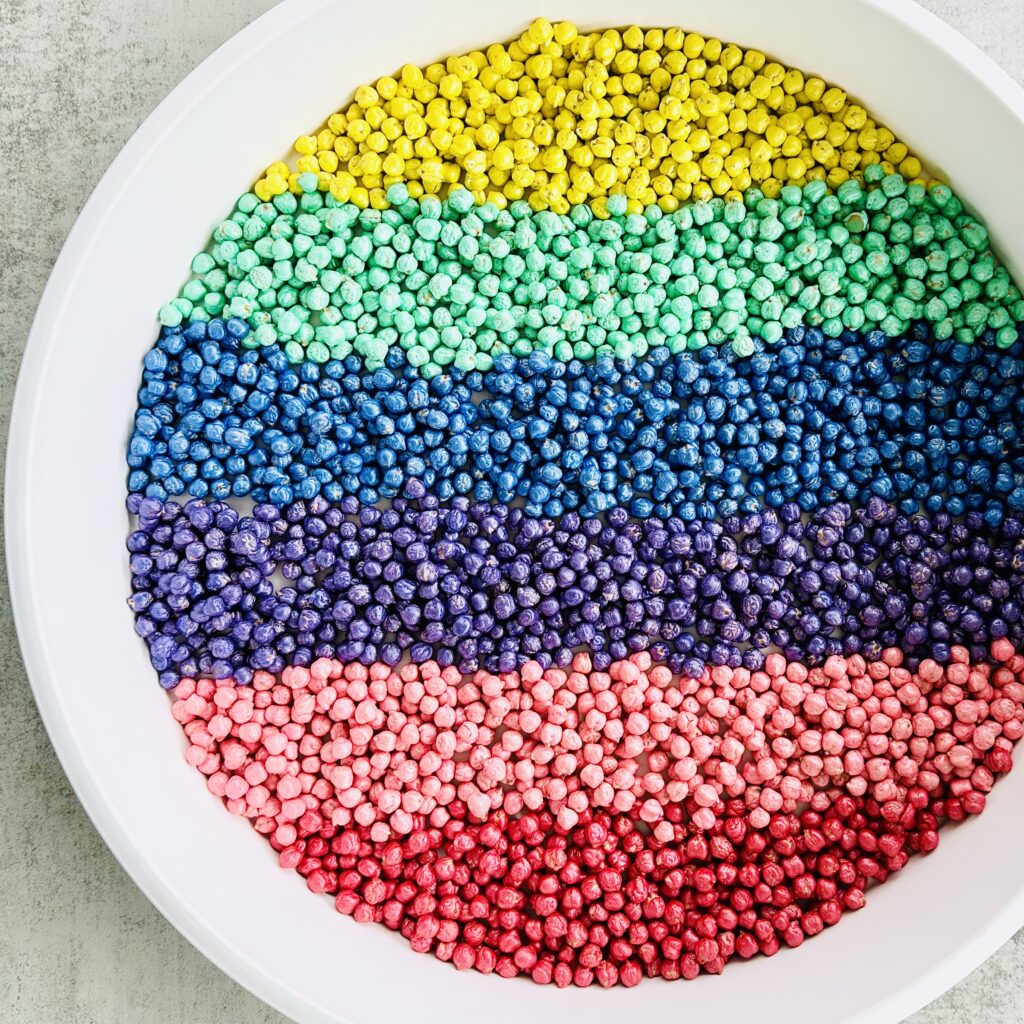
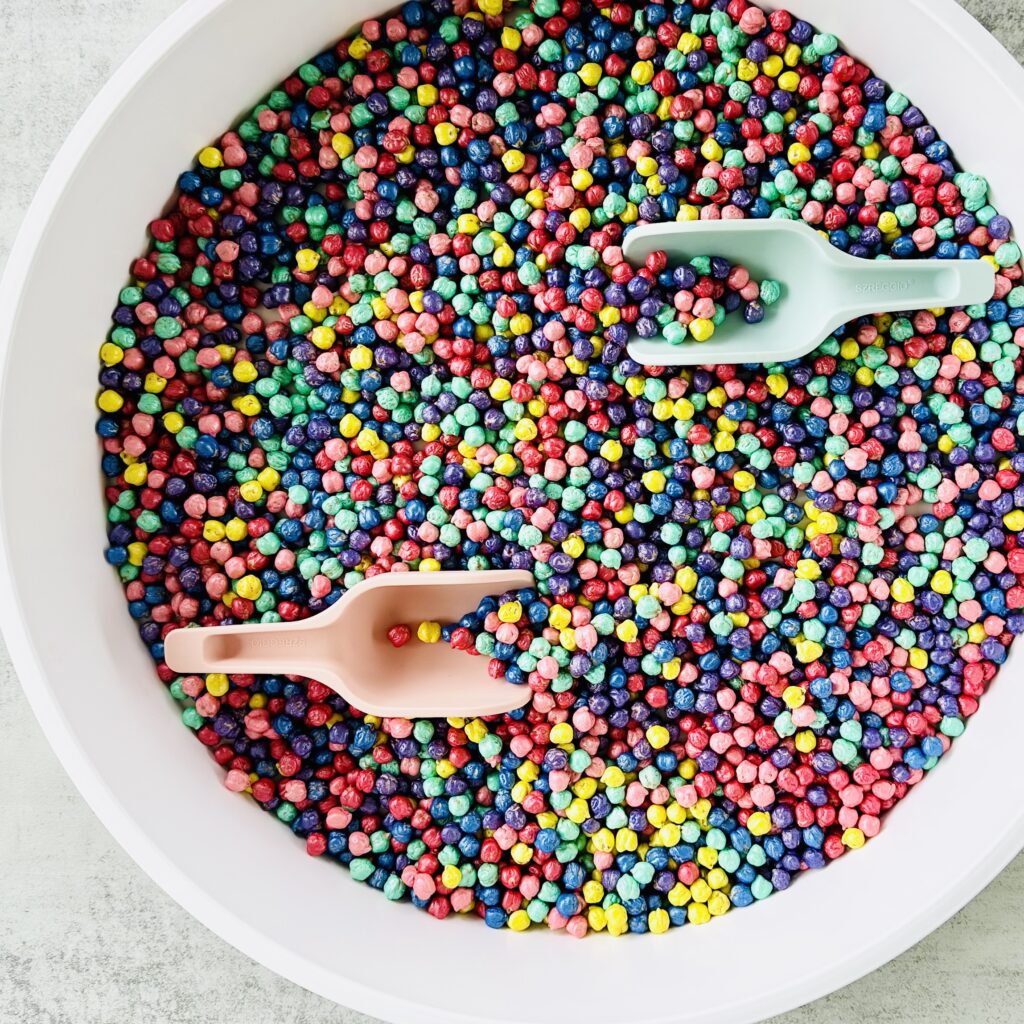
Once they’re dry, they’re ready for the sensory bin! Dump them in and let the fun begin.
How easy was that? And wait until you see the colors. The painted finish makes them look like candy-coated gems.

Creative Play Ideas with Painted Chickpeas
So now you’ve got your beautifully painted chickpeas what’s next? Sensory bins are just the beginning! Here are three fun ways to play:
1. Treasure Hunt
Bury small toys or figurines in a sensory bin filled with your rainbow chickpeas. Let your kids dig through the beans to find hidden “treasures.” The weight and clinking sound of the chickpeas make this extra fun.
2. Scoop and Pour Station
Set up cups, bowls, scoops, and funnels. Kids love transferring the chickpeas from one container to another. This not only keeps them entertained for a long time, but it also helps improve their fine motor skills.
3. Color Sorting
If you painted your chickpeas in different colors, make it into a sorting game. Provide matching-colored bowls or cups, and let your kids sort the chickpeas by color. It’s a sneaky way to introduce color recognition and sorting skills, all while they think they’re just playing!
How to Store Your Painted Chickpeas
Wondering how to keep your beautiful, vibrant chickpeas around for future play? Don’t worry, it’s super easy! Once you dye your chickpeas and they are completely dry, just toss them into an airtight container or Ziplock plastic bag. As long as you store them in a cool, dry place, they’ll last for years.
Pro tip: I like to use large, bulk-sized storage containers and keep all my sensory fillers (painted chickpeas, dyed rice, beans, and more) in one place. That way, whenever we’re ready for a new sensory bin, everything is organized and ready to go.
Why Chickpeas Are Amazing for Sensory Play
You might be wondering why paint chickpeas? Chickpeas are incredible sensory bin fillers. What’s so special about them? Let me tell you!
- Weight: Chickpeas are heavier than a lot of other fillers, which adds a unique tactile experience for kids. Kids can scoop, pour, and even run their hands through them for a fun sensory experience. The weight adds more feedback to their little hands, which is especially great for kids who need a bit more sensory input.
- Sound: Since chickpeas are heavier, they also make a fun clinking sound when they hit a container or when kids pour them from scoop to scoop. The noise is a huge hit with sensory seekers!
- Color: Once painted, these colorful little beans are seriously gorgeous. Think rainbow-colored Skittles but without the sugar rush!
Pros and Cons: Acrylic Craft Paint vs. Iridescent Acrylic Paint
When it comes to painting chickpeas, both acrylic craft paint and iridescent acrylic paint get the job done beautifully, but each brings something a little different to the table.
Acrylic Craft Paint is the classic choice. It’s affordable, comes in every color under the sun, and dries quickly with a bold, matte finish. The coverage is fantastic. Even just a small amount will coat a lot of chickpeas. The downside? The finish isn’t shiny, so while the colors are vibrant, they won’t have that extra sparkle or shimmer.
Iridescent Acrylic Paint, on the other hand, is the showstopper. It gives chickpeas a glimmering, pearly finish that catches the light and makes your sensory bin look magical. Think mermaid tails, dragon scales, or gemstones! The drawback is that iridescent paint alone doesn’t always give strong color coverage, it’s more translucent. For the best results, pair it with regular acrylic craft paint underneath and then layer the iridescent on top. This way, you get bold color and shimmer.
Both types of paint are awesome, so it really depends on the vibe you want. If you’re going for solid, bold colors, stick with acrylic craft paint. If you want sparkle and shine, add iridescent paint into the mix. Or better yet, use both!
Why You’ll Love To Paint Chickpeas
You’ll love learingin how to paint chickpeas for sensory play because it’s simple, budget-friendly, and totally customizable. They look stunning, they last forever, and they provide tons of sensory fun for kids. Plus, the process of painting them is just as enjoyable as the play that comes after.
So grab a bag of chickpeas, your favorite paints, and let’s make some sensory play magic happen!
Recommended
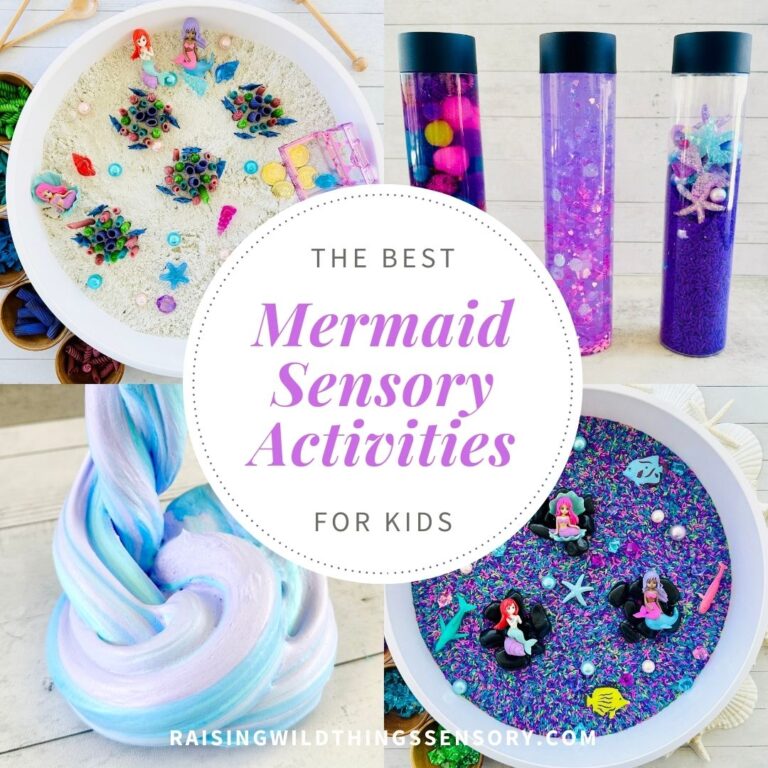
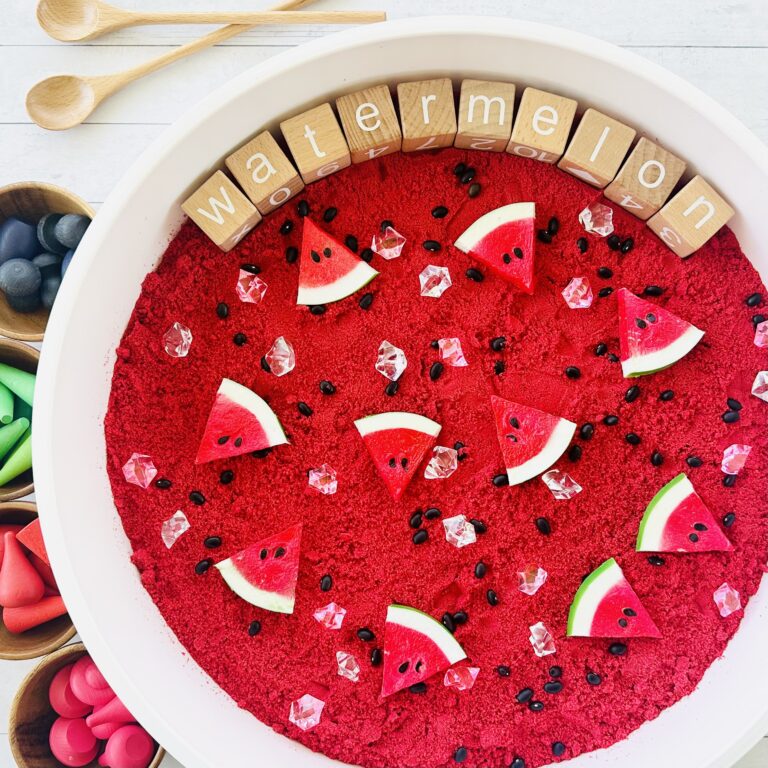
- 18 Recipes: The Best DIY Sensory Bin Fillers
- How to Dye Chickpeas for Sensory Play
- How To Dye Rice To Make Rainbow Rice
- How To Dye Pasta Noodles For Sensory Play
- How to Make Jello Blocks for Sensory Play
- How to Make Taste-Safe Chia Seed Sensory “Slime”
- How To Make Edible Dirt For Sensory Play
- How To Make Edible “Mud” Playdough For Sensory Play
- How To Make The Best Taste-Safe Kinetic Sand
- How To Make Taste-Safe Moon Dough For Sensory Play
- How to Make Taste-Safe Chia Seed Sensory Mud Slime
- How To Create Awesome Colorful Bubble Foam
- How to Make The Best 2 Ingredient Cloud Dough
- How to Make The BEST 2 Ingredient Edible Play Dough
- Guide To Sensory Bin Supplies You Need To Have


One Comment
Comments are closed.